VMware ESXi: Repair Datastore
When you are managing one or more ESXi servers, you have to be careful with the datastores because that’s where everything lies. If the datastores get corrupted, your server won’t run, and the VMs won’t launch, either. Whether you use RAID storage technology or just the normal regular storage technology, data corruption can still occur due to several possible reasons.
Damaged or corrupted ESXi datastore can be traumatizing, but then you shouldn’t let it throw you off balance – you can fix everything back up using DiskInternals professional tool, VMFS Recovery. This professional software can fix any VMware host- or -VM-related issues as fast as possible.
Overview
Often, you will see some people complain about facing issues with their ESXi setups due to damaged or corrupted datastores, even though they use different RAID arrays. This shows that files can get corrupted irrespective of the storage drive or technology you decide to go with. The most important thing is to keep a handy recovery tool to always come to your aid at such heartbreaking moments.
Well, the truth of the matter is, if your VM’s datastore or VMDK file is corrupted, damaged, or inaccessible, there are two known ways to fix things up – either by using built-in free tools or a professional third-party application that would provide you with more user-friendly options to repair the damaged file(s).
How To Fix Issues Using Built-In Tools
Here are steps to take to repair a problematic VMFS datastore without installing any third-party application. You should follow these steps carefully and allow them to run completely, and sequentially.
1. Connect to ESXi via SSH and view the list of all your datastores to see the UUID of the problematic one.
- Command: # esxcli storage filesystem list
2. List the active files in the problematic datastore (Note: the first column shows the required PID).
- # lsof | grep '/ vmfs / volumes / 46280b99-a202235b-fa23-fc15b41d2801'
- Replace 46280b99-a202235b-fa23-fc15b41d2801 with the actual UUID of Your problematic datastore.
3. Kill all the active PIDs in the problematic datastore (they are the ones preventing you from unmounting the problematic datastore). Use the command:
- # kill 44172
- Remember to use the actual PID of the datastore to replace 44172
4. Now, unmount the datastore.
- # esxcli storage filesystem unmount -u 46280b99-a202235b-fa23-fc15b41d2801
- Again, remember to replace 46280b99-a202235b-fa23-fc15b41d2801
5. You can now connect to ESXi and check if everything is fixed; if needed, mount the datastore.
- #Done
Well, if this doesn’t fix the issue for you, then you should use a professional software to get your ESXi host working fine again and all your VMs to launch seamlessly.
Repair VMware ESXi Servers Using VMFS Recovery
The DiskInternals VMFS Recovery is a professional software application that lets you fix corrupted VMDK in the easiest way possible. This software app runs on all Windows OS versions, including server OSes – its efficiency has been proven over the years by many expert PC operators. Apparently, you can use DiskInternals VMFS Recovery to recover and repair ESXi databases.
More interestingly, the DiskInternals VMFS Recovery is able to recover VMFS partition tables and repair your VMDK architecture while the recovery process is still ongoing. The intuitive GUI makes it even more easy to use this software for any VMware recovery need. Other impressive features supported by DiskInternals VMFS Recovery include:
- Connects to VMware servers via ESX/ESXi or vSphere.
- Recovers and fix ESXi datastore issues, irrespective of what caused the issues.
- Supports all RAID arrays.
- Guarantees up to 99 percent efficiency.
- Lets you mount virtual disks and images as local drives, accessible from File Explorer.
- Recovers VMFS drives from corrupted and inaccessible hard drives.
- Contains all features of DiskInternals RAID Recovery.
Recovery Guide
Step One: Install DiskInternals VMFS Recovery

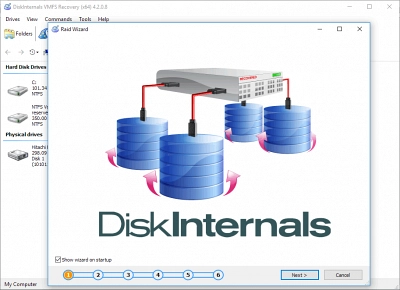
Download the executable file and launch it – follow the prompts to install the software on your computer system. After installation, launch DiskInternals VMFS Recovery and follow the Recovery Wizard for faster processes.
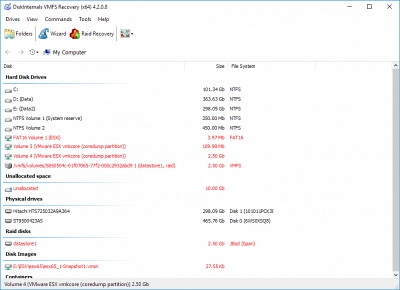
Step Two: Select The Drive

Select the hard drive where your virtual hard disks were created and click NEXT to choose a recovery or scanning mode. There are basically two types of recovery modes to choose from Full Recovery and Fast Recovery modes. The fast recovery mode scans the disk very fast and gets back quite a lot of files, but the full recovery mode recovers everything that has ever been lost on the selected drive, including the datastores.
Step Three: Preview

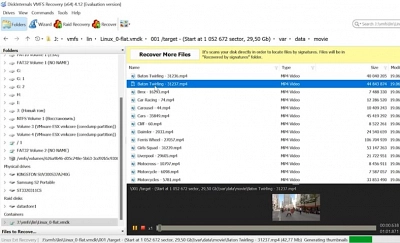
Once the scan runs completely, you can preview the recovered files to confirm they are the actual data you wanted to get back. You can preview the recovered files; DiskInternals VMFS Recovery comes with a previewing engine that allows you to preview various file formats.

With the datastores recovered, you can proceed with mounting the datastores; then you can sign in to your ESXi host, access the datastore, and recover files from your VMFS volumes if need be. Learn more about VMFS 5 vs 6 recovery here!
Conclusion
DiskInternals VMFS Recovery automatically fixes and repairs your datastores during recovery processes, so your VMFS volumes and files would remain intact when the datastores have been successfully recovered; you can then launch your VM and continue operations from where you stopped earlier. Learn how to prevent issues and backup VMware ESXi virtual machines!
