How to create a virtual SAN in Hyper-V?
In this article you will find out:
- what is a SAN
- hot to use SAN for VM Backup
- how to create a Hyper-V Virtual SAN
Are you ready? Let's read!
What is a SAN?
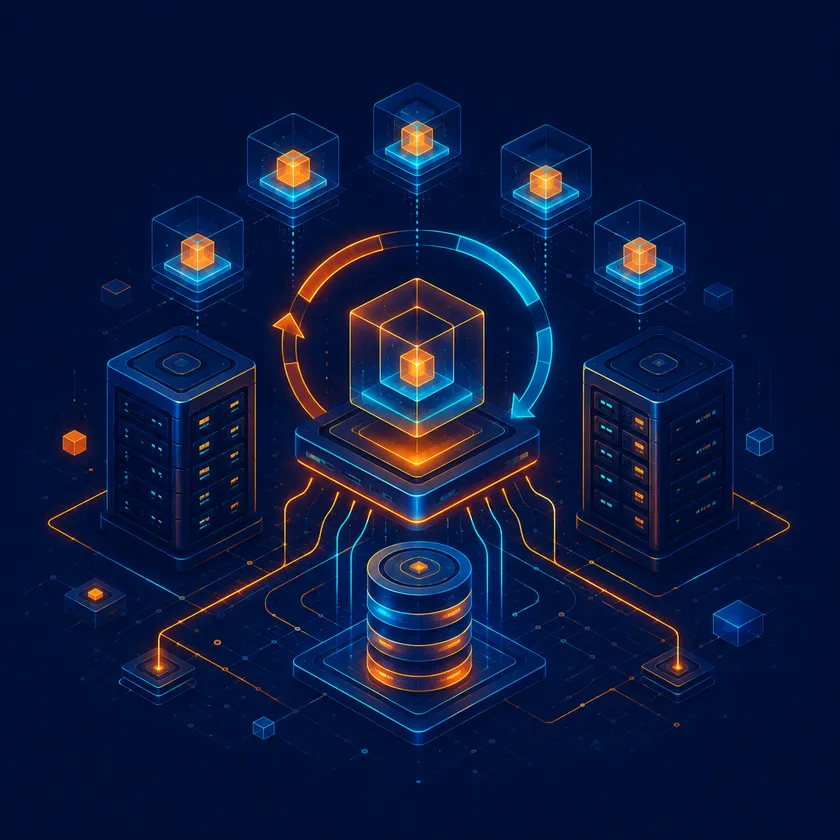
A storage area network (SAN) is used in corporate data centers and is the main storage medium, without which virtualization is basically impossible. SAN is a powerful, complex and multifunctional device, making it worth the price. SAN has multiple storage controllers, I/O cards, disks, network connections, etc. providing high performance, redundancy, and backup capabilities.
This article will introduce you to Hyper-V SAN in more detail and tell you how to create a virtual SAN in Hyper-V.
How to use a SAN for VM Backup
When using a SAN, you need to ensure that it is used as efficiently as possible and that all of its features and capabilities are used. Therefore, advanced backup solutions must interoperate with the SAN in a way that maximizes the value of the enterprise. By using a SAN for backups, you can minimize the impact on production performance with data protection jobs transferring data out of production.
Creating a Hyper-V Virtual SAN
With the virtual Fiber Channel feature in Hyper-V, you can directly connect to a SAN.
- First, you need to create a virtual SAN. Go to Server Manager and click on “Tools”. Select “Hyper-V Manager” and on the taskbar, click “Virtual SAN Manager”. Now click on the “Create” button and enter the basic parameters to create the vSAN. Then click “OK” to create the vSAN.
- The second step is to add the virtual Fiber Channel adapter and then connect it to the vSAN. Go back to Server Manager, select the “Tools” tab, and then click “Hyper-V Manager”. Go to the “Virtual Machines” section and select the one you want. On the taskbar, click the “Options” tab, then select “Add Hardware” and click “Fiber Channel Adapter”. Now select the “Add” button. Connect the virtual Fiber Channel adapter to the previously created vSAN.
RAID Recovery: protect your data
Since Hyper-V often runs on RAID array, and if the array was damaged it can be a problem. But thanks to the built-in Recovery Wizard in RAID Recovery it is so easy!
After recovery, files and folders are exported to local or remote locations (including FTP), and any virtual disk can be converted to local for access in Windows Explorer. Another useful feature is Unicode and multilevel folder support.
Instructions for RAID Recovery are below:
- 1. Install VHD recovery tool on your computer after downloading it from the DiskInternals website.
- 2. Launch the application.
- 3. Select one of the following modes: Recovery, Reader or Uneraser. In Reader or Uneraser mode, open the logical disk, which is contained in the hard drives section of the disk list from the RAID disk.


- 4. Select the file and right-click on it. Choose "Preview file in a New Window". Check the integrity of the file.
- 5. If everything suits you, it's time to buy a license and export all found files at your discretion.
Tip: Discover the difference between Hyper-V and VMware recovery!
If there is an issue with file recovery on Hyper-V, communicate with DiskInternals support.
Good luck! You will definitely succeed!
Related articles
- Xen VHD Recovery
- Virtual Machine Disk Consolidation Is Needed: Full Fix Guide
- How to get full screen in Virtualbox
- How to Convert VMDK to VMX
- Easiest Guide to Copy VHD to Physical Disk Without Data Loss
- Failed to Read from File VMDK: Causes, Solutions, and Prevention
- Diskinternals VMFS Recovery Serial Key
- Convert VHDX to VDI: Easy Methods & Data Recovery Insights
- KVM vs VirtualBox: Architecture, Features, and Performance Comparison
- KVM vs LXC: Full Comparison of Performance, Security & Use Cases
- Xen vs KVM vs VirtualBox: Full Hypervisor Comparison 2026
- Restarting Management Agents ESXi: All Methods & Safe Guide
- Merge VHDX and AVHDX: Hyper-V Snapshot Merge Full Guide
- NSX-T vs NSX-V: Architecture, Features & Migration Guide
- Corrupted Xen VHD: Repair & Recover Damaged XenServer Virtual Disks
- Convert VMX to OVF & OVF to VMX: Full Guide with ovftool
- VMX vs VMDK: VMware File Differences, Roles & Recovery
- KVM vs Docker: Performance, Isolation & When to Use Each
- Oracle DB Create Schema: How to Create Schema in Oracle Database
- VMware Drag and Drop Not Working? Fix Issues in Workstation, Player & Windows 10
- Parallels vs VMware Fusion: Performance, Features, and Best macOS Virtualization Option
- Convert OVA to Hyper-V: Step-by-Step Guide for Easy Virtual Machine Migration
- Guide to Change VMware ESXi Logs Location
- LXC vs KVM vs Docker: Full Linux Virtualization Comparison 2026
- Compare VMware Essentials Editions: Features, Cost & Guide
- Hypervisor Comparison 2026: Top Platforms, Types & Best Picks
- XCP‑ng vs VMware ESXi: Performance, Features & Pricing Compared 2026
- Xen VHD Recovery: Recover & Repair XenServer Virtual Disk Files
- VMware virtual machine Networking & ESXi Network
- VMware Snapshot Quiesce: When to Use It & How It Works
- VMware Memory Hotplug Linux: Ubuntu, CentOS & Debian Guide
- Xen vs. VMware: Hypervisor Comparison — Architecture, Performance & Cost
- How to Create a Virtual Switch in VMware Workstation & ESXi
- Compare VMware Essentials Plus and Standard - Full Feature Guide
- How to repaire corrupt VMDK header files
- How to Mount VHD Files in Windows 10: A Comprehensive Guide
- How to Mount VHDX Files in Windows 10: A Comprehensive Guide
- How to Recover Corrupt VMDK File in VMware
- How to Convert VHDX to VMDK: Comprehensive Guide with Recovery Tips
- How to Increase VMware Virtual Disk Size and Expand Partition?
- How to Mount a VMDK File from Another VM in VMware: Step-by-Step Guide
- How to Move VMware VM to Another Host Without vCenter
- How to Fix/Repair Corrupted VMDK Files Effortless
- How to Create and Use Shared Folders in VirtualBox: A Comprehensive Guide
- Proxmox Backup and Restore: Comprehensive Guide for Efficient Data Management
- What Is the VMX File in VMware ESXi?
- How to Convert VMware VMs to Hyper-V
- Manage Hyper-V Integration Services 2026
- How to set up Hyper-V network adapters - guide
- Disk Mode for the ESXi VM. What is it and how do we use it: VMware
- VMware ESXi Root and Default Password
- How to Fix DiskPart Virtual Disk Service Errors in DiskPart 2026
- How to open VMDK files
- How to Access VMFS Datastore from Linux, ESXi host or Windows
- Recover a Deleted VMFS Datastore on VMware ESXi
- Comparing Virtual Disk Formats: VDI, VHD, and VMDK
- Fix "Virtual Disk Service Error Clean Is Not Allowed”
- How to FSCK VMFS Repair?
- Install ESXI on USB
- How to create a virtual hard disk (VHD) on Windows
- How to Backup and Recovery ESXi Virtual Machines?
- VMFS UNMAP: What is It?
- Comprehensive Guide to VMware File Types and Extensions
- VHDX Repair: Comprehensive Guide to Fix Corrupt or Unreadable VHDX Files description
- How to Backup VMware ESXi Virtual Machines - Back Up ESXi Host Configuration
- Repair VHD - Virtual Hard Disk repair tool
- Read VMFS partition on Windows
- Understanding Datastore Inaccessibility in VMware
- How to Restore VHDX File: Step-by-Step Guide for VHDX Restore to HDD, Disk, and More
- VMware VMX vs VMDK Repair: Fix, Rebuild & Recover VM Files
- KVM vs ESXi: Performance, Cost & Architecture Compared
- ESXi vs KVM vs Xen: Full Hypervisor Comparison 2026
- VMware Quiesce Meaning: Definition, How It Works & When to Use It
- VMware CPU Cores per Socket Best Practice, Licensing, and Performance
- VMware Hotplug Memory & CPU: Enable, Configure, and Disable Guide
- What Is VMFS in VMware: VMFS File System Explained and Features
- KVM vs Hyper-V: Performance, Architecture, and Virtualization Comparison
- Xen vs KVM: Hypervisor Architecture, Performance, and Platform Comparison
- Proxmox vs KVM: Virtualization Architecture, Performance, and Platform Guide
- KVM vs QEMU: Architecture, Performance & When to Use Each
- VMX Configuration File Options: Complete VMware VMX Parameters Reference
- VMware Cannot Open Configuration File VMX: Fixes & Recovery
- VMware ESXi USB Passthrough and Mount USB Drive ESXi Guide
- USB Boot in VMware: VM Workstation Boot From USB Guide
- VMware ESXi Networking Concepts: vSwitch, VLAN, and Design Guide
- Recover Missed VMDK Descriptor: VMware Repair and VMFS Recovery Guide
- Hardware RAID Enterprise Usage vs Software RAID: Full Guide
- How to Convert VMDK to VMX | VMDK to VMX Converter and Recovery Guide
- What Is Change Block Tracking? VMware CBT, Enable, Reset, CTK Explained
- VMware Converter VMDK to OVF | VMware VMDK to OVF Converter Guide
- VMware Boot ISO Image: How to Boot from ISO in vSphere and Workstation
- Migrating VirtualBox VM to Hyper-V - Complete Guide
- What is a VM Cluster and How to Create It
- Mastering VMware Snapshot Recovery: Understanding, Creating, Managing, and Restoring VMs
- Physical Server vs. Virtual Server: Key Differences
- About VirtualBox network settings
- What is а LUN? (Logical Unit Number)
- Virtual Machine vs. Cloud Server: Key Differences, Performance & Cost Guide
- How to fix a Time Capsule disk in "Internal disk needs repair" status?
- Difference between VMFS 5 vs VMFS 6
- Unlocking a Locked VM in Proxmox: Step-by-Step Guide to Resolve and Prevent Issues
- Migrating VMFS 5 Datastore to VMFS 6 Datastore: A Step-by-Step Guide
- VDI vs VMDK: Performance, VirtualBox and Mac Comparison Guide
- How to Restart a VM Safely | VM Restart Methods and Recovery Guide
- Proxmox Backup Server: Comprehensive Guide to Setup and Management
- What is VMware DRS?
- Steps to update VirtualBox
- VM Backup vs Snapshot: Key Differences & VMware Best Practices
- How to Install VIB on ESXi: ESXCLI Commands for ESXi VIB Installation
- vSphere vs OpenStack - Full Comparison
- How to Recover VMDK File: Recover VMware VMDK File and Extract Data from VMDK
- Dual Boot Linux vs Virtual Machine: Performance, Setup & Recovery Guide
- VMware Cold and Hot Migration: What Is It
- VMware Cloud Foundation
- How to Fix DiskPart Virtual Disk Service Errors in 2025 - Best Ways
- VMware DRS (Distributed Resource Scheduler) - What is it?
- DiskInternals VMDK Viewer
- Proxmox Server Setup: Complete Guide to Install and Configure Proxmox VE
- Convert VHD from Dynamic to Fixed | Easy Guide to Convert Dynamic VHD to Fixed
- Overview and Configuration of USB Passthrough in VMware Virtual Machines
- What Is a Port Group in VMware & Distributed Port Group Explained
- Convert VHD to VMDK - Free Methods
- What is a KVM Virtual Machine? | KVM Virtualization Explained with File Recovery Solutions
- oVirt vs KVM: Key Differences, Performance, and Which Virtualization to Choose
- Mounting Server Disks
- Xen vs Proxmox - A Comprehensive Comparison
- Extract VMDK from OVA: Step-by-Step Guide for VMware and Data Recovery
- VMware Converter to OVF: Fix Unable to Parse OVF File & Export VM
- VMware Converter V2V Conversion Guide: V2V VMware Converter Migration
- How to Start a VMDK File Without a VMX File: Boot and Recovery Guide
- Convert VMDK to QCOW2 & QCOW2 to VMDK with qemu-img (KVM Guide)
- Convert VMDK to VDI VirtualBox | VirtualBox Convert VMDK to VDI Guide
- Export a VMware Virtual Machine from ESXi | ESX VM Export Guide
- Mount VHD in Windows 7
- Compare WSL vs Virtual Machine
- VMware Delete from Disk vs. Remove from Inventory - Key Differences Explained
- Kubernetes vs VMware: Key Differences, Use Cases, Cost & Recovery Guide
- How to SSH Into ESXi Host Securely
- SQL Server Virtual Machine vs. Physical Machine: Performance & Best Practices
- What is VMware ESXi Server?
- Repair ESXi datastore
- VHDX Files and How to Mount Them on Windows
- Is VMware virtual machine inaccessible? Fix it in 2025!
- ESX Partitions: All You Wanted to Know
- How to recover deleted virtual machine in VMware?
- Want to increase VirtualBox disk size?
- Recover VM from flat VMDK - The Best Solutions
- How to Fix ESXi Boot Failure in UEFI Configuration?
- Enabling SSH
- How to download VMDK file from datastore to Your System in the VMware
- How to format VMware disk using ESXI
- What Is Raw Device Mapping (RDM) in VMware? Benefits, Setup, and Use Cases
- VMware CPU vs Core: CPU, Cores & vCPU Optimization for Virtual Machines
- VMware vs Red Hat Virtualization Comparison - Pros & Cons
- AWS vs VMware: Pricing, Performance & Hybrid Cloud Comparison
- VMware OVA vs OVF: Key Differences, Use Cases, and Recovery Tips
- VMware ESXi vs NSX: Key Differences, Use Cases, and Integration Explained
- AWS vs VMware: Pricing, Performance & Security | Azure vs VMware Cloud Guide
- OpenStack vs Proxmox VE: Compare Virtualization, Deployment, and VM Recovery
- OpenShift vs VMware: Key Differences, Use Cases, and Comparison Guide in 2026
- Difference Between OVF and VMDK | VMware File Formats Explained
- VMware Blast vs PCoIP: Performance, Compatibility, Recovery Explained
- Import VMDK to Proxmox: Step-by-Step Proxmox VMDK Import Guide
- QEMU vs VirtualBox vs VMware: Performance, Usability, and Best Use Cases
- QEMU vs VMware: Performance, Features
- Bootcamp vs Virtual Machine: Windows on Mac Performance & Recovery Guide
- Best VMware Admin Tools: Optimize Performance with Essential Management Tools
- Checking VMDK Disk for Errors (VMDK check tool)
- How to Install Mac OS on VMware Workstation
- How to Install VMware Fusion on a Mac | Step-by-Step VMware Setup Guide
- How to Install macOS on VMware
- Best Virtual Machines for Mac OS X: A Guide to Installing Mac OS on VMware
- Free VHD Viewer & Free App to View VHD File | Safely Open and Preview VHD/VHDX
- VMware High Availability vs. Fault Tolerance - Key Differences
- How to Install Windows on Mac VMware Fusion - Windows 10 & 11 Guide
- KVM vs VMware: Performance, Features, Cost & Comparison of Virtualization Platforms
- Proxmox vs oVirt: Full Comparison of Virtualization Platforms in 2026
- How to Convert VMware to oVirt: Importing VMware VMs to oVirt
- OpenStack vs Nutanix: Key Differences, Use Cases, VM Recovery & Performance Guide
- Migrate oVirt to VMware - Can I Move VM from oVirt to VMware?
- OpenStack vs VMware: Cost, Features, Scalability & Virtualization Comparison
- Open VM Tools vs VMware Tools: Feature, Update & Performance Differences
- oVirt vs VMware: Compare KVM oVirt vs VMware ESXi for Virtualization in 2026
- How to Repair Damaged VMware Virtual Machine (2025)
- Convert OVA to VHD | How to Convert VHD to OVA | Step-by-Step Guide to Virtual Machine Conversion
- How to Install Ubuntu Desktop & Server on Proxmox | Step-by-Step VM Installation
- How to Install VirtualBox Extension Pack on Windows, Linux & macOS
- VMDK to VHDX: Convert VMDK to VHDX with PowerShell & Tools
- VMware Data Recovery Software
- Restore VMware VMs in Minutes — Fast, Safe & ESXi 8 Ready
- VMware: Workstation Pro vs Workstation Player
- Resize VDI - How to Resize VDI Files: Step-by-Step Guide
- How to Copy ESXi VM and Copy VM from One ESXi Host to Another
- How to Recover VMDK File on oVirt
- What is a VM Snapshot: Comprehensive Guide to Virtual Machine Snapshots
- Create VM Template in VMware: Step-by-Step Guide
- VMware EVC Mode: What It Is, How It Works, and How to Enable It in vSphere
- What Is VMware Data Recovery?
- VMware Data Recovery Services
- Recover VMware virtual machine
- Restoring The Entire Virtual Machine Whith DiskInternals VMFS Recovery
- ESXi UEFI booting hits a roadblock, halting at the "VMware Hypervisor Recovery" phase with no further advancement
- What Is Backup and Recovery? - Backup vs Recovery
- Why Is Your VM (Virtual Machine) Running Slow?
- Types and Strategies of Backup: Understanding Incremental, Differential, and Full Backups
- Comparison between HA vs DRS (Distributed Resource Scheduler) in VMware vSphere
- Diverse Hyper-V Replication and Failover Types
- What exactly is VM sprawl, and what steps can be taken to prevent it?
- ESXi repair install
- Recovery and Restore of vApp Data: Comprehensive Guide
- What is a Virtual Hard Disk (VHD File)?
- Fix VMFS Corruption
- Convert a VMware Workstation VM to ESXi using 3 Ways
- How to Disable Hyper-V in Windows 10 and 11: Complete Guide
- Resolving "VMware File Not Found" Errors: Comprehensive Guide to File Recovery
- How to Restore VMDK to a Physical Drive - Complete Guide
- Mastering VMware Disk Mount: A Comprehensive Guide for Windows 10 Users
- Remote Recovery
- Download VMware Data Recovery Plug-in by DiskInternals
- Free Download VMware Data Recovery Tool
- Data Recovery on iSCSI LUN: Comprehensive Guide to Prevent and Recover Data Loss
- Recover a Deleted Virtual Machine in Proxmox: Step-by-Step Guide
- VMware Player Snapshots: Limitations, Workarounds, and Best Practices
- What is a VM Server? | Understanding VM Server Architecture & Benefits
- VDS fails to claim a disk
- Virtual Disk Service Error The Object Is Not Found - How to fix?
- VMware Data Recovery configuration
- Vmware Delete Flat File - Let's Figure It Out
- How to Clone VM in Hyper-V - Best Ways!
- How to check VMFS for metadata corruption
- Virtual Disk Bad Blocks: Detection, Repair, Prevention
- What is VMware vCloud Suite - Why Should You Use it?
- VMware vSphere 8.0 - What's New?
- VMware ESXi Home Lab: Ultimate Guide to Setup, Configuration, and Best Practices
- Recovering a Virtual Machine in Oracle: Step-by-Step Guide
- VHD Recovery Software - Recover Corrupt or Deleted VHD Files
- VMware Workstation: The Specified Virtual Disk Needs Repair Fix
- How to recover a corrupt or damaded VMDK file on Mac?
- Repair virtual disk in VDMK
- How to Recover or Remove Orphaned Virtual Machines
- How to Fix VMDK is Corrupted and Cannot be Repaired
- How to Delete VHDX File in Windows 11 | Step-by-Step Guide + File Recovery Tips
- How to Install macOS on VMware ESXi or VMware Workstation
- Mount VHDX Linux: Step-by-Step Guide to Mounting VHD and VHDX Files on Linux Easily
- What is vApp in VMware? Key Concepts and Usage Examples
- VMware VMDK Recovery Tool
- How to Recover Data from Virtual Disk Files
- VMware missing VMDK file
- Tools to mount VMFS on Linux, ESXi, Windows
- VMFS Partition Table Recovery
- What is quiescing VMware vSphere?
- How to Resize a VHD File or VHDX
- SCSI Controller in VMware: Types, Benefits, and Configuration Tips for Optimal Performance
- How to Backup VMware Data. Backup solution for Vmware
- Restore Hyper-V Virtual Machine from VHDX: Quick and Reliable Recovery Guide
- How to Open a VHDX File: Extract Data & Recover VHDX Files with Ease
- Proxmox vs. Hyper-V: In-Depth Comparison of Virtualization Giants
- Ultimate Guide to Migrating Proxmox VMs to a New Server
- What is a Virtual Machine? | Guide to VM Components & Benefits
- Proxmox vs VirtualBox: Comprehensive Performance & Feature Comparison
- VDI Meaning: What Is a VDI? Virtual Desktop Infrastructure Explained
- Convert VHD to VHDX: Easy Steps to Convert VHDX to VHD Format
- Recover Deleted VHD Files Easily: Step-by-Step Guide for Successful Recovery
- Proxmox vs. VMware: Comprehensive Comparison, Performance, and Cost Analysis
- How to Backup ESXi Host Configuration: Step-by-Step Guide for VMware Administrators
- What is Nutanix and How It Works: Discover What Nutanix Does and Its Use Cases
- VMware disk image recovery - 2025 expierence
- Best VMware Backup Software and Solutions | Top Backup Options for VMware 2025
- Best VMware Backup Solutions in 2025: Comprehensive Guide and Top Picks
- Change log for VMFS Recovery™
- VMware Distributed Switch – The Complete Guide
- How to Recover a VMware Image
- How to Install VIB on ESXi: ESXCLI Software VIB Install Guide
- Virtual Data Recovery Services
- How to Install VMware Tools on Ubuntu | Install VMware Tools on Ubuntu 22.04
- Nutanix vs AWS: Key Differences, Use Cases, and Choosing the Best Cloud Solution
- Master Proxmox CLI Commands: Your Guide to Virtualization Management and Troubleshooting
- Proxmox Disaster Recovery: Step-by-Step Guide to Secure Your Virtualized Environment
- Proxmox Backup Server Setup: Step-by-Step Guide for Configuration
- VMware Disk Image: 2025 guide
- Restore your Lost VMware Files - DiskInternals VMware data recovery
- Proxmox VE Minimum Requirements: Essential Hardware for Optimal Virtualization
- Proxmox NAT Setup: Step-by-Step Guide to Configure NAT & Recover VM Files
- How to Install Proxmox VE on Ubuntu Server & Desktop | Complete Installation Guide
- What is a VMware VIB File? Comprehensive Guide to .vib Files and Data Recovery
- Proxmox Backup and Restore: Easily Restore VM from Backup or to a New VM
- VMware Player vs Hyper-V: Performance, Features, and Comparison Chart
- Nutanix vs VMware: Comprehensive Comparison of Virtualization Platforms
- How to Fix a Corrupted VirtualBox VMDK Compressed Image
- How to Convert RDM to VMDK in VMware: Step-by-Step Guide
- Exploring Alternatives to VMware ESXi for Virtualization: Top Options in 2026
- The Best Virtualization Software of 2026: Top Picks and Recovery Tips
- Proxmox Recovery: Step-by-Step Guide to Restore VMs and Recover Lost Data
- How to restore VHD file backup? (2025)
- VMware Horizon Vs VDI by Microsoft - What the difference
- Understanding the Differences: VDI vs HVD
- Corrupt VDI File: How to Fix and Recover Virtual Disk Data Effectively
- How to Create a VDI from a Hard Drive: Step-by-Step Guide for VirtualBox Users
- VDI Recovery Software to Restore VM VirtualBox and VDI Files
- Comprehensive Guide to Virtual Data Recovery Software | Best Tools & Tips
- How to Convert VMDK to RDM: Step-by-Step Guide for VMware Storage Management
- How to Recover VHDX Files (VHDX recovery)
- VMDK file format - What is Virtual Machine Disk format
- Restore VMDK from Backup: Comprehensive Step-by-Step Guide
- How to Convert or Migrate Hyper-V to VMware VM
- What is VMware Remote Console and how Use it in Linux and Windows?
- Proxmox vs ESXi for Homelabs: Choose the Best Virtualization Platform for Your Setup
- Proxmox vs ESXi: Comprehensive Guide to Choosing the Best Hypervisor
- How to Find MAC and IP Address of a Virtual Machine in VMware | VMware MAC & IP Guide
- Free VMFS Reader for Windows, Linux & macOS – Access VMware VMFS Volumes Easily
- How to Paste in VMware Console | Enable Copy and Paste in VMware Console Guide
- VMware to Nutanix Migration: Step-by-Step Guide for Seamless Transition
- VHD vs VHDX Performance: Key Differences, Benefits, and When to Choose
- Proxmox Backup vs Snapshot: Key Differences for Data Protection
- RDM vs VMDK: Key Differences & Performance Insights for VMware Environments
- VMware Disk Types: Thick, Thin, and RDM Explained for Virtual Machine Management
- What Is an RDM? Learn About RDM Storage and Disks in VMware
- Proxmox: How to Delete a VM Safely | Step-by-Step Guide
- Virtual Server Data Recovery: Restore Lost Data from VMware, VMFS, and VMDK Files
- Docker vs VMware: Performance, ESXi Comparison, Containers & Key Differences
- Docker Meaning, Definition & How It Works: What Docker Is Used for in Software
- How to browse VMDK file
- VMware Hypervisor Recovery: Strategies and Best Practices
- VMware disk needs repair
- VMware Disaster Recovery (DR) Solutions
- Repair-VHD PowerShell: Step-by-Step Guide (3 Essential Steps to Fix VHD)
- VMware VMDK Recovery Tool - Restore VMDK Files
- Reset a Virtual Machine in VMware
- How to Extract Files from VMDK: Best VMDK Extractor Methods
- How to Copy Files from VM to Local Machine | VMware File Transfer to Host Guide
- Restore VMware VM with snapshot(delta.vmdk) files⠀
- Restore a VMDK file
- What is ESXi Recovery Mode
- VMFS Recovery™ for VMware Data Recovery
- Unable to Connect to Virtual Disk Service in Disk Management: Fixes & Solutions
- VMware ESX vs. ESXi - Main Differences. Detailed Comparison
- VMware snapshot best practices
- VMware Workstation and Its Uses
- VMware vMotion storage: What do You Need to Know
- What is virtualization? | Meaning of virtualization
- How to install Kali Linux in VirtualBox⠀
- What is Virtual Desktop Infrastructure(VDI)?
- What is Hyper-V VDI and Its Benefits
- Citrix vs VMWare VDI - What are the differences in 2025?
- ESXi 7.0 ESXCLI Command Reference in 2025
- What is the 3-2-1 backup rule?⠀
- What is thin provisioning (TP)?⠀
- VMware vSphere Replication
- Restore VMware virtual machine from VMDK file
- What is VMware vCenter Server and How Does It Works
- VMware NFS vs VMFS
- Hyper-V NIC Teaming⠀
- VMware vMotion requirements: for VMs and for hosts
- Intel VT-x in BIOS: how to enable it?
- What is the difference between VMware HA vs vMotion
- VMware FT vs VMware HA: what the difference?
- What is Space Reclamation and How to Perform It
- What is VM Host Server
- VMware Template vs. VMware Clone: the differences and similarities
- VMFS Block Size: How to Choose
- VMkernel Ports and Networking Layers
- What is NVRAM?⠀
- VMware ESXi vs vSphere vs vCenter: Key Differences, Features, and Which to Choose
- What is a Snapshot in VMware⠀
- VMware Network Adapter settings
- What is vVol and How Does That Work
- VMware Player Shared Folders⠀
- Result code: e_invalidarg (0x80070057)
- Using and Creating VMware Content Library: Features, Setup, and Best Practices
- Recover Deleted VMDK from Datastore Today
- No bootable medium found
- How to remote control an Ubuntu System
- How To Perform a USB Passthrough in Hyper-V⠀
- VirtualBox vs. VMware - Comparison
- Hyper-V Nested Virtualization - all about and how to enable⠀
- Hyper-V Export VM: How Does It Work
- Hyper-V Checkpoint and Its Importance for VM
- repair VMDK files in VMware | DiskInternals VMFS Recovery™
- Hardware virtualization is enabled
- ESXi Free Limitations: Pros and Cons
- About VMware home lab
- Ways to Fix VirtualBox E_FAIL (0x80004005) Error⠀
- Host Profile in VMware - what is and how to use it?
- The Ultimate Guide to AWS EBS Snapshots: How to Create, Manage, and Optimize Your Snapshots
- Virtual Desktop Infrastructure and VMware Horizon
- VMware Infrastructure: What Components are Used
- Disaster Recovery Checklist: You Need A Plan
- How to create a Virtual Machine from a hard drive
- How to Install Kali Linux VMware
- How to Clone a VM - Best Steps to Using in VMware
- VMware vSphere 7
- VMware Fault Tolerance: what is it and how does it work?
- Here is everything you should know about GMSA
- Thick vs Thin Provisioning: All You Wanted to Know
- VMware vMotion vs storage vMotion: all you wanted to know
- What is VMware VDS and How It Works
- What is VMware HA?
- VMware vMotion: all you need to know
- What is VMware networking?
- VMware vSwitch
- VMFS Recovery software as a solution for NFS data repair
- Setting up VirtualBox
- How to Manage VMware ESXi
- How to Upgrade VMFS from 3 to 5th version
- Install Ubuntu on VirtualBox
- The best solutions for Virtual Machine in Windows 10, 11
- Here is how to enable virtualization
- P2V vs VMware: What is Better for You?
- About VMware vRealize Orchestrator