How Does Hyper-V Export VM Work?
Here you will find out:
- what is Hyper-V VM export
- how does it work
- when DiskInternals can help you
Are you ready? Let's read!
What is Hyper-V VM export?
Hyper-V VM export is the rather lengthy process of exporting a specific virtual machine (this includes virtual hard disk files, virtual machine configurations, and Hyper-V snapshots) to one device. This procedure is performed both when the VM is on and when it is turned off, but only on demand. Starting with Windows Server 2012, you can export a virtual machine directly to a network share.
Often, Hyper-V VM export is compared to or even confused with Hyper-V checkpoints.
However, exporting a VM takes a fairly long time, while making checkpoints is a quick process. In essence, an exported VM is almost a complete copy of an existing virtual machine that can be sent for storage to another location. Exporting the VM, however, does not use encryption, compression, deduplication and encryption methods, which does not allow for more efficient use of available disk space.
Tip: Discover the difference between Hyper-V and VMware!When do you need to export a Hyper-V VM?
In fact, exporting virtual machines can be used in many situations and in different fields of activity.
- 1. Of course, if you have no other way to back up a VM, then exporting it can help you. As mentioned above, this is not a complete copy of the VM, since some functions are not available (encryption, compression, etc.), and the efficiency of available disk space is lower, but you can consider it as an option.
- 2. Also, by exporting the VM to another device, you can start testing and fixing various kinds of problems. This way, you protect your VM from sudden damage and save all your data.
- 3. Another option is to export the VM to the archive, if you don’t need this VM at the moment. At any time, you can go back to the archive and restore the desired VM.
How do you export a Hyper-V VM?
First, create a disk image before exporting the VM, so it will be more reliable. Then you will be sure that if something goes wrong, a disk image will be there for you. DiskInternals VMFS Recovery will give you the opportunity to create a disk image for free in minutes. Therefore, it is worth thinking about this opportunity very seriously.
After creating a disk image, you can start exporting the VM. Here you will be offered two ways to do this; choose the more suitable option for you.
1. Export using Hyper-V Manager.
Go to Hyper-V Manager and select the desired VM with the right mouse button. From the list, select the “Export” tab. Open the Export Virtual Machine Wizard and click “Browse”. Here, specify the location to which the virtual machine should be exported. In the "Status" column, you can monitor the export process. As soon as the VM export is finished, open the folder. This way, you can make sure everything is in order.
2. Export using the PowerShell cmdlet. You will be able to regularly back up running virtual machines without downtime and additional failures.
Go to PowerShell with administrator privileges. Use this command to start the VM export process:
Export-VM -Name DemoVM -Path 'C:\Virtual Hard Disks\Exported VMs'
And to export all available virtual machines to the root of the C (C :) drive, type:
Get-VM | Export-VM -Path C:\
Now you have the exported VM in the new location.
If your VMDK files are lost, what should you do?
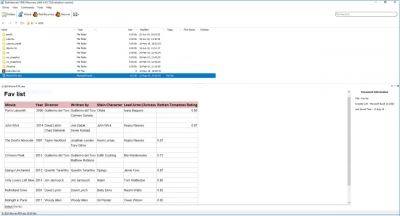
In this case, DiskInternals VMFS Recovery application will come in handy again. You will receive high-quality file recovery in real time without needing to shut down the virtual machine. That is, you can continue to use the VM. You also have a unique opportunity to view found files for free to check for file integrity. Then you need simply to buy a license agreement to save the recovered data to the desired location.
Read the instructions for using DiskInternals VMFS Recovery below.
As soon as you open the application, connect via SSH (if necessary), and then open the disk (it can be a local disk or SSH).
Next is the scan, which will take some time. Then the search results will appear on the screen, then find the necessary VMDK files and mount them.
Open the mounted VMDK file and, as mentioned above, browse the files for free.

Then obtain a license agreement and complete the export of data to the storage device.
Tip: learn how to clone VM in Hyper-V!

