How to install Hyper-V Manager on Windows 10
Here you will find out:
- requirements to install Hyper-V
- Role or Server
- how to install Hyper-V and when DiskInternals can help you
Are you ready? Let's read!
How to install Hyper-V on Windows 10? There are some tips you need to know, and of course, there are prerequisites that should be considered.
Requirements to install Hyper-V
Before you can smoothly install and use virtualization on your Windows 10 computer, it must match certain prerequisites. It's also crucial to keep in mind that depending on your Windows OS edition and version, these requirements can be slightly different. The following criteria apply:
- 64-bit processor with a clock speed of 1.4 GHz
- SLAT, for improving virtual machines performance and reducing hypervisor overhead
- Your system must support VM monitor mode extensions
- At least 4GB of RAM to install Hyper-V
- Intel Virtualization Technology (Intel VT) or AMD Virtualization Technology (AMD-V)
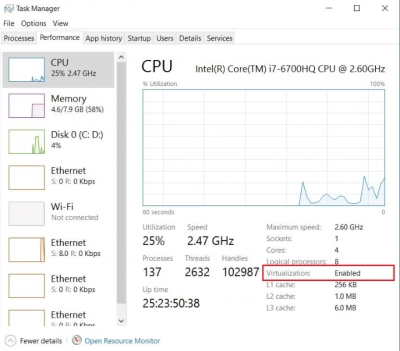
- Hardware-Enforced Data Execution Prevention (DEP) with AMD NX (no execute bit) or Intel XD (disable execution bit).
Install Hyper-V: Role or Server?
The two most popular types used by IT professionals and normal PC users who want to run virtualization are role and server. Both are excellent and have particular benefits and drawbacks. However, administrators and IT professionals that are familiar with command-line interface (CLI) programs favor Hyper-V Server more.
Role
Role installed on Windows Server allows for the creation of virtualized computing environments for managing virtual machines. With Role, you can run multiple operating systems on one physical computer and each of the OS would run separately.
Put simply, Role is a Windows Server virtualization component. Mostly Hyper-V Role is used by beginners who are not yet “very” experienced in handling virtual machines via the CLI.
Well, you can install some products to help you manage Role functions remotely - products like Hyper-V Manager MMC (Microsoft Management Console), System Center Virtual Machine Manager, or PowerShell. To run Hyper-V Role, you need licensing; plus, Hyper-V Role additionally offers a GUI.
Server
Server does not require further configuration as with Role. It is mostly used by IT Pros with experience in using command-line interfaces (CLIs). you don't need licensing to run Hyper-V Server; it is self-service hypervisor-based server virtualization; however, all guest operating systems to run on the server must be genuine.
Unlike Role, Server is fully based on CLI. Server offers better performance because it contains only the Windows hypervisor and core virtualization components. Notwithstanding, the truth is that Role and Server are both type 1 hypervisors.
Install Hyper-V: What You Should Know About Enabling
If you enable Role, your Windows Server will go through the hypervisor and keep it a type 1 hypervisor - the Windows server will run like a typical Virtual Machine on the system. Both models are identical, but the licensing is different.
Also, with Hyper-V Role, you can add a GUI and integrate many other Windows services on the host. You can also install Hyper-V Role on Windows Server Core to make it much closer to an actual Server.
Choosing between Hyper-V Role and Server is more on personal preference and expertise, because, they both offer almost the same capabilities with a slight (almost insignificant) difference in the same performance. Then, in summary, no matter how you set up Hyper-V, it will run as a Type 1 hypervisor.
Note: more about repair software RAID!1. Script to download and install Hyper-V for Windows 10
If you need to run Hyper-V on Windows 10, you need a script to do that. Actually, there is a Github code that allows automating the download and activation of Hyper-V on a Windows environment. Here’s the script:
pushd "%~dp0" dir /b %SystemRoot%\servicing\Packages\*Hyper-V*.mum >hyper-v.txt for /f %%i in ('findstr /i . hyper-v.txt 2^>nul') do dism /online /norestart /add-package:"%SystemRoot%\servicing\Packages\%%i" del hyper-v.txt Dism /online /enable-feature /featurename:Microsoft-Hyper-V -All /LimitAccess /ALL pause
How do you run this code?
- Right-click on a white space on your Desktop and select to create a new Text Document.
- Copy this code - all of it - and paste it into the Text Document you created.
- Save the Text Document file as Enabler.bat
- Ensure you saved the file on your Desktop for easy access.
Note: The document file must be saved in (.bat) format for it to run as a script. (.bat) extension represents a “Batch File.”
2. Run Enabler Batch file
With the .bat file saved on your desktop, you will need to run it as an Administration. That means to say that you have to be an Admin, or log in with an Admin account on the computer you're using to run this setup.
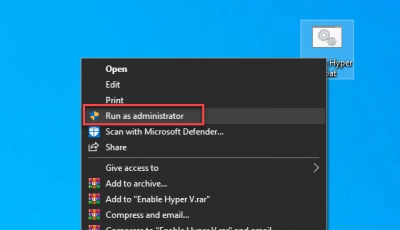
If you’re on an Admin account, right-click on the .bat file and select “Run as Administrator.” Then, allow the processes to start up.
3. Install Hyper-V: beginning
Automatically, when you run the BAT script, it would prompt a CMD interface and start running the code/script saved in the file. You don’t need to do anything, simply allow the process to run by itself, automatically. Also, ensure the computer is connected to the internet so that the script would download and install all required files and data.
4. Reboot Your System
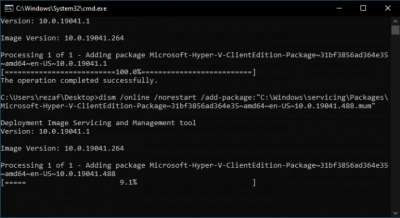
When the installation process is completed, close the CMD prompt (if it doesn’t close automatically). After you have closed it, shut down the system, leave it for some seconds, then power it back up.
5.Service is Now Installed
After the computer boots up, the environment is now available on the Windows PC running Windows OS Home edition. To check for the Hypervisor feature, follow the procedure below.
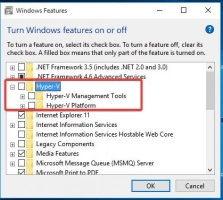
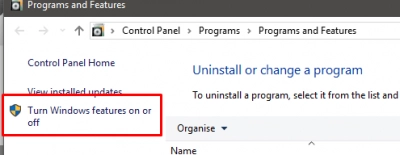
- Click on Windows Search Box or Search Icon on the taskbar and type Turn Windows features on or off
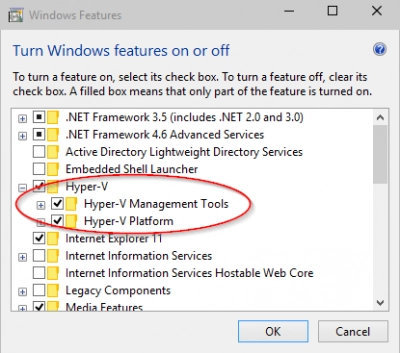
- Open the related Settings from the search results
- Look out and expand the option; ensure that all its sub-options are all checked
- Save the settings and close the dialogue
Now that you've confirmed the feature on your Windows OS PC, the next is to run a Microsoft virtual environment to create VMs. The procedure to run is pretty straightforward - explained below:
- Return to the Search box/icon and search for service
- Click on the icon when it appears
Or,
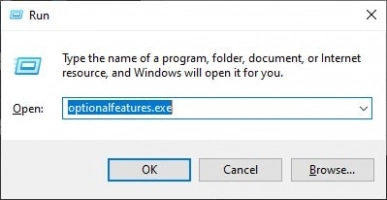
- Press Windows Key + R to launch the “RUN” box
- Type virtmgmt.msc into the box and click “Run” or press the ENTER key on your keyboard.
How to Create a Virtual Machine (VM)
To create a virtual machine with Manager; connect to a server, right-click on the server, and select "New."
- Choose “Create a new virtual machine.”
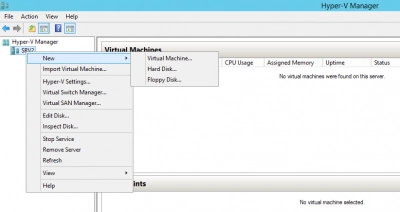
- Enter a name for your VM.
- Choose the Generation for your Virtual machine (leave it at default if you're not conversant with these settings).
- Assign the RAM to use.
- Configure the Network and size of the Virtual Disk.
- Load the ISO file of the OS you want to run on the VM.
Uninstall/Disable on Windows 10
If you’re done using the feature, you can uninstall or disable it on your system following the steps below:
- Go back to the Turn on or Turn off windows feature page
- Look for program and uncheck it
- Click OK to save the changes
- Restart your PC.
Just that and service would be deactivated on your computer.
Protect Your Data - Create Back UPs
Whatever you’re doing on a computer system, it is important to run routine backups. There are many software applications out there that allow you to make backups; however, DiskInternals RAID Recovery software lets you do it for free, and it actually creates “Disk Images.” These disk images serve as the backups of the selected hard disk.
DiskInternals RAID Recovery
This is an intuitive RAID Recovery app with a built-in "Wizard" that helps the user to recover lost RAID files easily. DiskInternals RAID Recovery can recover lost files and partitions from all kinds of RAID arrays and Virtual Machines.
It is regularly updated and integrates several handy features, as well as support various file systems. RAID Recovery by DiskInternals can recover files from damaged pools that no longer mount and automatically figures out pool and filesystem parameters, including the disk order.
Furthermore, it can recover previous versions of files (if available), verifies checksums to ascertain the file's integrity, and works efficiently on all Windows PCs.
Recovery Process
First Step:
Connect the hard drive where the files were lost - to a computer system via USB or any other supported means of connectivity.
Second Step:
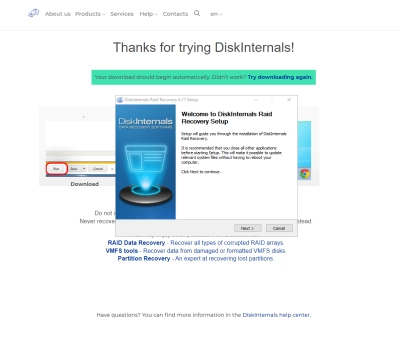
Boot the computer where the hard drive is connected and install DiskInternals RAID Recovery software. After the installation, launch the program and follow the Recovery Wizard prompts to recover your lost files from each of the connected drives, one after another.
Recovery Tips
Consider these tips when attempting to recover files using DiskInternals RAID Recovery.
- Don’t rush the process - allow each step to run completely and successfully before proceeding to the next. Else, you may not recover all your lost files.
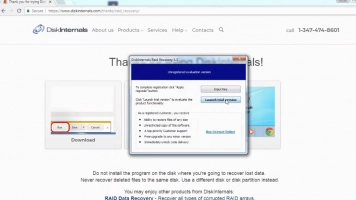
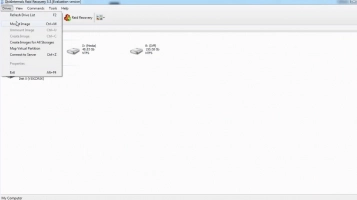
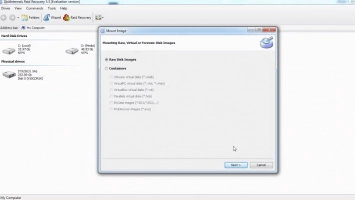
- Verify that you chose the exact disk drive that had the lost files you want to recover. If you select the wrong drive, you won’t get back any of the lost files.
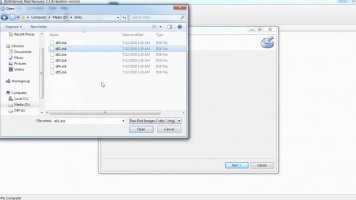
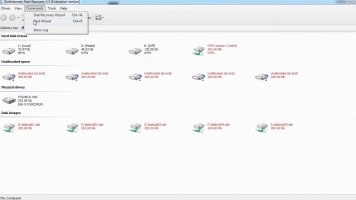
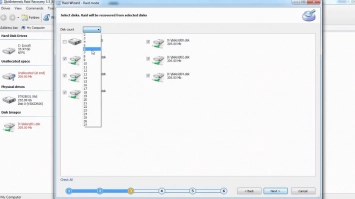
- DiskInternals RAID Recovery comes with a previewing engine, so you can preview the recovered files before saving them back to your local or remote storage.
Important Note: Ensure that you do not save the recovered files on the same drive where they were previously saved - from where they got lost.
Video Guide:
Here is a clear-cut video that visually explains the RAID Partition recovery process using DiskInternals RAID Recovery. Learn more about RAID Server failure recovery.
RAID Failure Prevention Tip
RAID failures cannot be entirely avoided, but here are some prevention tips that may be of help.
- Always monitor the RAID disk drives’ critical SMART parameters, health status, and temperature routinely. This will help you identify RAID array failure signs earlier and fix them before it escalates.
- Always back up your data regularly because no one can be too sure when data loss could occur.
- Don’t perform CHKDSK or SFC scans in a bid to fix and repair RAID array errors.
- Don’t ever use the “beta” version of a RAID firmware, OS, or system file. However, ensure to keep your OS and critical software apps updated to their latest stable versions regularly.
Reserve at least two new or empty drives to use in replacing failed drives in an array.
Conclusion:
Summarily, this article explains how to install and deactivate program on a system running Windows 10. It also mentions the importance of data backup and recovery.
It is a Type 1 Hypervisor and it can be run on Windows 10. It is easy to set up - you only need to run the script and activate it under Windows features. Also, you can deactivate the feature on your system at any time you wish.

