How to Rebuild RAID 0 Without Losing Data
RAID 0 is a type of RAID array known as “Stripe” or “Stripping.” This is because it emphasizes data stripping. Disk striping means splitting data into multiple data blocks and spreading it across multiple storage devices connected in an ARRAY. SSDs or HDDs can be used for RAID 0 setup.
Apparently, RAID 0 comes in handy in applications where data needs to be accessed quickly. But before switching from a single-drive storage to a RAID setup, it is important to first backup your files on the drive using a reliable data backup software program.
Understanding RAID 0
Redundant Array of Independent Disks (RAID) is a modern disk storage approach adopted by companies and even individuals that have to deal with chunks of data. There are different types of RAID setups, which are commonly referred to as “ARRAYS.”
This storage technology is increasingly popular because it offers improved data access, higher performance, and data loss mitigation. When one of the RAID array disks fails, your files can still be accessed.
RAID 0 is the foremost RAID array setup and it is widely used by many top firms and individuals. It is a type of RAID array with data is split and saved across all drives in the setup. You need a minimum of two SSDs or HDDs to make a RAID 0 array and it offers better data protection compared to other RAID array types.
Benefits:
- Supports disk striping, which means improved performance since the storage setup will deliver maximum bandwidth – combined from all connected drives.
- Affordable to set up, easily compatible with all hardware controllers
- All available storage space can be utilized and used to store data
Drawbacks:
- The major, and maybe, the only disadvantage of setting RAID 0 is its lack of data redundancy. This means that if one of the RAID disks fails, the entire array has failed.
Common Reasons for RAID 0 Failures:
RAIDs don’t just fail on their own, there are quite pointable reasons why a RAID 0 array, or any RAID array at all, would fail.
1. Physical Damage to One or More Drives.
Apparently, physical damage sustained by one of the drives puts a threat to the entire data saved on the array. Just as you shouldn’t let your single-storage hard drive sustain physical damages, your RAID disks deserve such protection too.
2. Software or Driver Corruption.
If you’re running software RAID (although not always recommended), any issue with the controller will lead to a fatal RAID failure disaster. Also, if your disk drivers are outdated or corrupted, your RAID will fail.
3. Incorrect Configurations or Human Error
RAID arrays are distinguished by their configuration patterns the configuration of RAID 0 differs from that of RAID 1 and every other RAID array type. Incorrect configuration of the RAID array or human errors may lead to total failure and loss of files.
Preparation Before RAID Rebuild:
When your RAID 0 fails, you can rebuild it and continue to enjoy the benefits it has to offer. But before proceeding to rebuild your RAID 0, you should adhere to these important steps.
1. Ensure You Make a full Backup of Your Data
Honestly, it is worth overemphasizing the importance of making data backups, especially for your important files. While rebuilding your RAID 0 array is sure to go smoothly, as a precaution, you should back up the files in the other accessible HDD or SSD before proceeding with the process.
2. Get Your Stuff Ready
The next step after backing up your data is to get everything you need for the RAID 0 rebuild ready. Do you need a new drive? Controller? Or anything else as per your need? Get all these things ready before taking the first step to rebuild the array.
3. Keep Everywhere Tidy
This does not necessarily refer to your physical environment, keeping everywhere tidy is mainly to ensure that your drives are in good condition, physically, and all items you need for the RAID setup are well placed around your work desk.
Step-by-Step Guide to Rebuilding:
After you have carefully acknowledged the prerequisites explained above, you can head on to rebuild your failed RAID 0 by following the steps below:
1. Check the Health Status of Each Individual Drive in the Array
Firstly, run a S.M.A.R.T. on all the RAID drives, individually, to ascertain they are all in good condition. If there’s a faulty drive, replace it with a good one before you start the rebuilding. If you proceed to rebuild your RAID with a faulty drive included in the disk array, the process may stop halfway and never get completed.
2. Identify the Root Cause of the RAID Failure
This is very important, you need to know what made the initial RAID array fail. Only when you know the cause of the failure, will you be able to tackle it and get everything working back in order.
3. Use a RAID Management Tool or Third-Party Software for the Reconstruction
In most cases, it is best to use third-party software programs to rebuild your RAID array, since the developers of the programs could offer you professional assistance to ensure a smooth rebuilding process. But if you’ve got a proprietary RAID management tool, you could use it oo.
Useful Tips to Avoid Common Pitfalls During RAID Rebuild
- Never run the CHKDSK command on the disks, it’ll cause more problems to whatever issue you’re facing already.
- Never proceed to use a drive with bad sectors in the array, the rebuilding process won’t complete.
- RAID rebuilding doesn’t always go smoothly, so make a backup prior.
Post-Rebuilding Steps:
After you have successfully rebuilt your RAID 0, here are some handy tips on what to do to ensure you don’t lose your important files and data.
1. Verify Data Integrity
Verify that all your files are data were copied back to the rebuilt array. If there are missing files, you should attempt to recover them using a data recovery solution.
2. Set Up Regular Backup Schedules
Everything may be looking fine at the moment, but you can’t predict what could happen in the next hour. So, you should set regular incremental or differential backup schedules for the tons of data being saved to your RAID array.
3. Regularly Monitor the RAID Array’s Health Status
Pay attention to the health status of your RAID array; you can monitor the health status through the controller. Depending on your RAID controller, how to keep an eye on your RAID array’s health status will differ.
Recover Lost Data With DiskInternals RAID Recovery
DiskInternals RAID Recovery is a professional solution for getting back lost files and data from RAID drives. This software program is able to recover your files irrespective of the RAID array type; it launches a deep scan into the hard drives and attempts to recover all your lost files, the file formats notwithstanding.
DiskInternals RAID Recovery is particularly developed for RAID data recovery. It is a reliable solace for companies and individuals that choose RAID storage as their preferred storage approach. The software supports all known file systems and can repair both software and hardware RAIDs even when you’ve got a damaged controller.
Learn more about RAID 0 versus RAID 1 recovery here!Features:
- Recognizes and repairs various RAID types
- Flaunts an intuitive interface anyone can easily understand and use.
- Supports both manual and automated recovery options with a built-in recovery wizard.
- Supports dedicated RAID controllers like HP, Adaptec, MegaRAID, Dell, Silicon RAID Controllers, and many others.
- Create disk images for free
- Up to 99 percent success rate
- 19 years of regular updates, trusted by world-renowned IT specialists, globally.
If you ever find yourself in need of a RAID recovery solution, the DiskInternals RAID Recovery program looks to check all the boxes, whether you’re an enterprise business or an individual.
Guide:
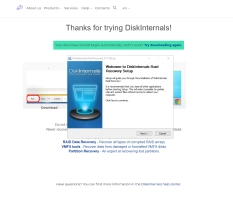
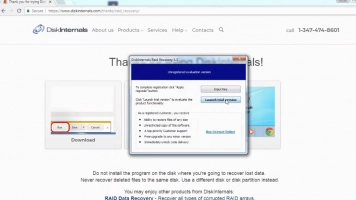
- Step One: Download and install DiskInternals RAID Recovery on your Windows 7-11 computer, and launch it. This software can also run on systems with Windows Server 2003-2019 OS.
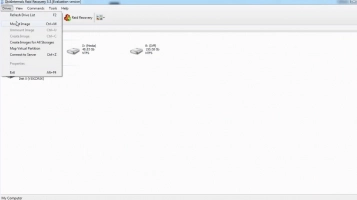
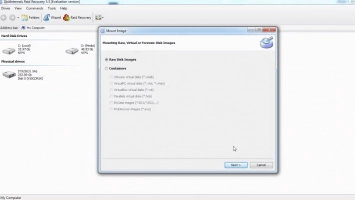
- Step Two: Choose your RAID array type and proceed to select a recovery mode: Fast Recovery and Full Recovery. DiskInternals RAID Recovery will launch a deep scan into your drives to check the status, file system, controller, and disks, and also restore lost files.
- Step Three: After the scan is completed, you’ll see all your files (including lost and deleted ones). However, they will be available as “Read-Only,” and you can preview most of the files.
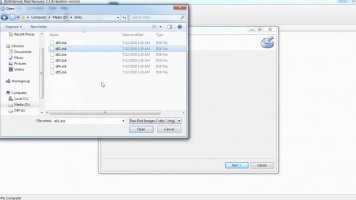
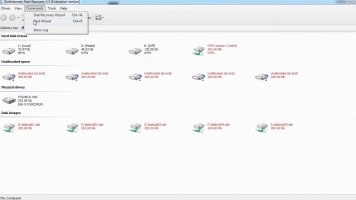
To save back the recovered files, you’ll need to purchase a license, and if your files were not recovered, you can request “Guided Repair Service” and have an expert take over your cause.
Note: learn more about RAID controller!Conclusion
RAID 0 improves speed and allows you to utilize every available space in your storage disks. However, because it lacks redundancy, it is necessary to make constant backups of your files so you don’t lose them in any case of disaster.
If you’re trying to rebuild your RAID array and everything looks complicated, have a professional handle it for you. Finally, you can always fall back to DiskInternals RAID Recovery if you need to recover or repair your RAID.
FAQ
What is RAID 0 and why might I need to rebuild it?
RAID 0, often referred to as "striping," distributes data across multiple drives for enhanced speed. A rebuild might be necessary if a drive in the array fails or if there are issues with the RAID configuration that jeopardize data accessibility.
Is it true that RAID 0 offers no data redundancy?
Yes, RAID 0 prioritizes performance over redundancy. Data is split (or "striped") across the drives, so if one drive fails, all data in the array is at risk, making recovery a challenge.
If one of my RAID 0 drives fails, can I recover the data?
Data recovery from a failed RAID 0 array is more complicated due to the lack of redundancy. Specialized software or professional data recovery services might be necessary to retrieve as much data as possible, but full recovery is not guaranteed.
How can I minimize data loss risk with a RAID 0 setup?
Regularly back up your data. Given RAID 0's lack of redundancy, having up-to-date backups is the most effective way to prevent data loss in case of drive failures.
What precautions should I take before attempting to rebuild a RAID 0 array?
Before starting, always ensure you have a recent backup of all data. If possible, use imaging software to create an exact replica of your drives. Approach the rebuild with caution and, if uncertain, consider seeking expert advice or assistance.
