When you use Windows OS, you’d definitely come across a few error messages timely. One of those common error messages faced by Windows 10 users is the Windows Update Error 0x80070424.
This error message screen typically pops up when system files don’t register accordingly – probably due to system update errors. Well, there are ways to navigate this error screen and regain access to your PC.
In this article you will find out:
efficient solutions for 0x80070424 error
how to protect your data
Are you ready? Let's read!
What Causes the Windows Update Error 0x80070424 on Windows 10?
There are a couple of reasons why this error message is showing on your Windows 10 PC. It could be because you tried updating your PC using Windows Update Standalone Installer (Wusa.exe) or the Windows Update option on the Settings page. Other possible causes include the following:
Required Windows update services are not running to allow the updates download to complete.
Required system files are missing from your Windows 10 PC.
How to Fix Windows Update Error 0x80070424?
1. Use Windows Update Troubleshooter
There are many troubleshooting tools built into Windows OS; one of them is the Windows Update Troubleshooter, which lets you troubleshoot common OS update issues. This utility tool is entirely free to use, and it is pretty easy too. To launch and use this tool, follow the steps below.
Steps:
Press the Windows key + I to launch the System Settings page.
Navigate to the Update & Security tab and go to the Troubleshoot section.
Look out for the Windows Update troubleshooter tool and launch it by clicking the “Run Troubleshooter.”
Allow the troubleshooter to run completely and automatically fix.
2. Repair Your System Using a Handy Tool
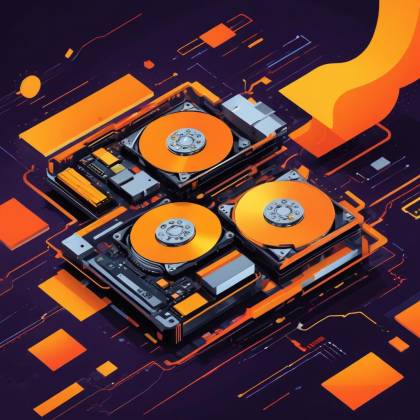
DiskInternals Partition Recovery can come in handy in situations like this to help you back up your important files before you try advanced troubleshooting techniques to fix the 0x80070424. With the Partition RecoveryTM tool, you can back up your hard drive as a disk image and also attempt recovery to retrieve any file you have lost on the hard drive prior.
Furthermore, the DiskInternals Partition Recovery tool can retrieve the “good” versions of your PC’s system files; corrupt system files can cause the 0x80070424 error, so retrieving the uncorrupted versions of those files can save the situation. DiskInternals Partition Recovery runs on all Windows OS versions from Windows XP to the newest Windows 11.
3. Run SFC (System File Checker) and DISM
The SFC and DISM are built-in free utilities available on all Windows OS computers. These tools can help to fix most Windows OS issues automatically. However, they require admin access, which means that you must have admin access on the PC before you can use either of these tools. Hereunder are steps to launch and use Windows SFC and DISM command-line utility tools.
Right-click on the Start icon (on the top-left edge of the taskbar) and select Powershell (Admin) or Command Prompt (Admin).
Type this command into the window: SFC /scannow.
Wait until the scan runs completely, then close the command prompt.
After the SFC scan is complete, it is advisable to run the DISM tool too.
2. DISM:
Right-click on the Start icon (on the top-left edge of the taskbar) and select Powershell (Admin) or Command Prompt (Admin)
Type this command into the window: DISM.exe/Online /Cleanup-image /Restorehealth
If the DISM tool fails to read the online source, try using an installation media (USB or DVD), then use this command instead: DISM.exe/Online /Cleanup-Image /restorehealth /Source:C:devicepath /LimitAccess
Replace “devicepath” with your installation media’s actual path.
4. Restart the Update Services
Restarting the Update Services option from the Windows Services page can fix the error. This option will reestablish a new connection to Microsoft’s Windows Update servers. To complete this process, follow the steps below:
Launch the Services Page (Press Windows key + R, type services.msc into the Run box, and hit the Enter button).
Scroll down on the Services page and find the Windows Update option.
Double-click to open the option and set the Startup type to Automatic.
Also, restart the Background Intelligent Transfer Service and the Cryptographic service.
You can use the Command Prompt (Admin) to effect these changes by typing the following command lines into the CMD interface.
SC config wuauserv start= auto
SC config bits start= auto
SC config cryptsvc start= auto
SC config trustedinstaller start= auto
Note: Enter these codes one after another, and always hit the Enter key when you enter each one.
5. Register System Files
For Windows updates to install correctly, your PC must contain some specific system files (.dll files); if these files are missing, you’d most likely get the 0x80070424 error message. You can register the system files manually by following the guide below.
Steps:
1. Launch the RUN box and run these command one after another.
regsvr32 Qmgr.dll /s
regsvr32 Qmgrprxy.dll /s
2. Restart the computer after running the second command. This should install the relevant system files needed for Windows updates to run successfully.
6. Reset Windows Update Components
If your PC’s Windows Update components are not running effectively, it will affect Windows updates. You can reset the update components by running a script (requires admin access on the PC). This script can be downloaded from Microsoft’s repository – here. When you download the script, extract the .zip file, and run the ResetWUEng.cmd file as an Administrator.
6. Update your PC
You can always try to download the update directly from the Microsoft update catalog, knowing the update code of the problematic update (usually, each Windows update code starts with KB, followed by a sequence of numbers).
Go to the Microsoft Update Catalog site, type the update code in the search box, and press Enter.
Next, find the update that uses the same architecture as your system and click the Download button next to the update.
Then run the setup file and follow the instructions to successfully complete the update installation.
Use DiskInternals Partition Recovery
Dealing with Windows OS error messages can be frustrating, and at some point, no troubleshooting method may work for you, which means your only option would be to reinstall Windows.
When it points down to this dead drain, it is important to first recover any files you have lost on your hard drive and then back up the drive before proceeding; this way, all your files, and data would be saved, and when you’ve got the OS all fixed up, you can resave the files you backed up earlier.
DiskInternals Partition Recovery is a truly powerful software tool for backing up your hard drive and recovering lost files from various storage media types. This software app runs on all Windows OS computers, and it is easy to use.
Guide:
Steps To Recover Lost Files:
Ensure the primary hard drive is visible on your PC
Install DiskInternals Partition Recovery on that computer system
Partition Recovery - Installation.Partition Recovery - select the corrupted hard disk to fix it.
Launch DiskInternals Partition Recovery and select the hard drive, then choose between Fast Recovery mode and Full Recovery mode – Full Recovery mode is recommended if you want to recover virtually all files lost on the drive
The retrieved files will be indicated with red asterisks, and you can preview them 100%
When you preview the files and find out, they are actually the ones you want to recover, upgrade to the PRO version of DiskInternals Partition Recovery and save the recovered files to another storage media.
Steps To Backup Data:
Ensure the primary hard drive is connected to your PC
Install DiskInternals Partition Recovery on that computer system
Launch DiskInternals Partition Recovery and close the Recovery Wizard that would launch automatically
Select the hard drive, right-click and choose “create disk image” from the context options. Or, simply select the hard drive and press Ctrl + C, then choose where to save the disk image.
Conclusion
These are the common and easiest ways to fix Windows Update Error 0x80070424 on Windows 10 computers. If the error persists, format the system and reinstall Windows, but before you do that, backup and recover your files using Partition Recoveryy by DiskInternals.
FAQ
How do I fix error 0x80070424 on Windows 10?
The Windows update error code 0x80070424 means the most recent OS updates could not be installed on your computer. Use a wired connection and restart your router to resolve the issue. Restart the Update services as well as run the Windows Update Troubleshooter.
Why is Windows 10 update failing to install?
This issue might indicate that the necessary updates aren't installed on your computer. Before you attempt an upgrade, check sure that your PC has all necessary updates loaded. This most likely means that there isn't enough free space on your PC to install the upgrade.
How do I fix your device is missing important Security and quality fixes 0x80070424?
The error code 0x80070424 indicates that your computer has failed to start the installation of the most recent updates. An unreliable network connection, bandwidth problems, or disk issues can cause this message.