
How To Solve 0x8007001f Error Code on Windows 10
This article will focus on error code 0x8007001f, which refers to update errors. Most often, the problem is closely related to audio drivers and prevents users from updating in Windows 10.
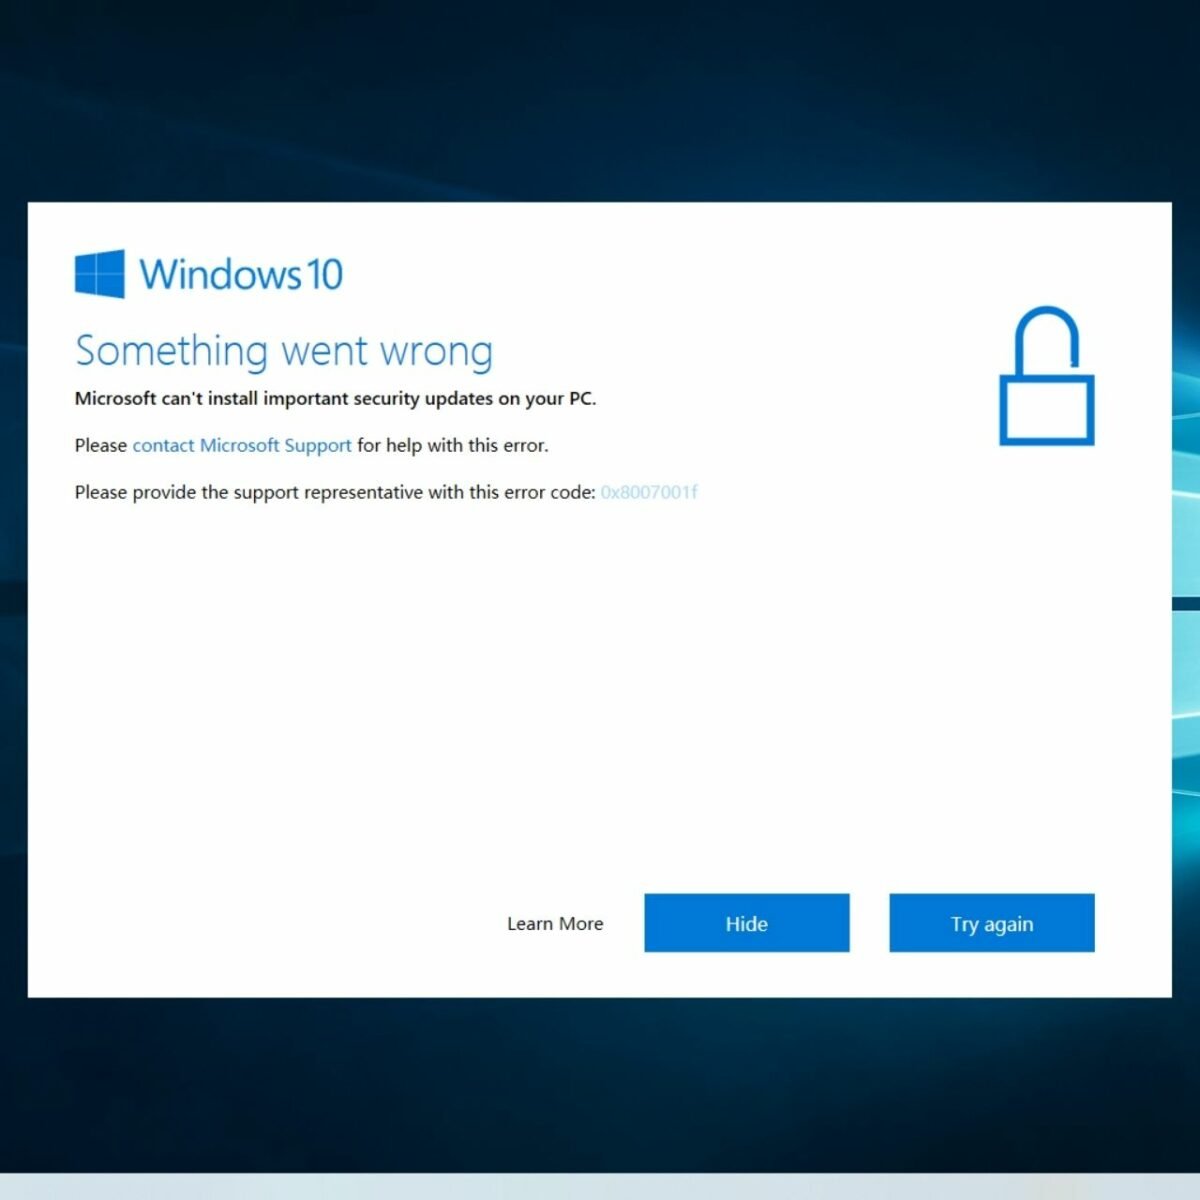
In such cases, you can use some workarounds to fix Windows update error code 0x8007001f.
In this article you will find out:
- how to deal with 0x8007001f error code
- how to protect your data
Are you ready? Let's read!
What causes Windows 10 upgrade error 0x8007001f – 0x20006?
According to users, sometimes error 0x8007001F can appear on your PC due to your audio drivers. If your audio drivers are outdated or corrupted, you might encounter this issue.
After doing that, you should try to download the latest drivers for your audio device.
We advise you to verify your security settings since, for instance, upgrade error 0x80070714 might happen if your firewall or antivirus program is preventing the update process from happening.
If your installation disc has been compromised as a result of a situation like this, the warning "Windows installation failed in secure OS phase" can show up.
Other manifestations of the Windows Update error 0x8007001F
Installing the most recent updates could be challenging for you if you see update error 0x8007001F. The following are some concerns people have expressed regarding the update:
- Error 0x8007001f prevented Windows from installing the aforementioned update. If you encounter this issue, you might want to disable your antivirus software or do a clean boot. This issue is usually brought on by third-party programs.
- Error 0x8007001f with the Windows 10 Update Assistant. It's a good idea to update any required drivers before attempting to upgrade Windows because your drivers might occasionally be the root of the issue.
- Update error Windows 7
- Even on previous Windows versions, update failures might occur.
- The majority of our suggestions should be easy to apply even if you're not using Windows 10.
Windows update error code 0x8007001f - How can I fix it
Microsoft often releases new Windows 10 upgrades. The fact that not every delivery is successful should go without saying.
One of the most frequent issues that Windows users run across while upgrading is the 0x8007001F error. Numerous factors, including a defective audio driver, corrupt system files, compatibility problems, or even just a bad Windows update download, may be at blame for this.
If a simple reboot doesn't solve the problem, it could be a good idea to attempt these clever remedies.
1. Use the Windows update troubleshooter
The Windows Update Troubleshooter is the simplest tool to use in order to quickly repair this issue. During the update process, this integrated tool looks for common faults and repairs them. How to use it is as follows:
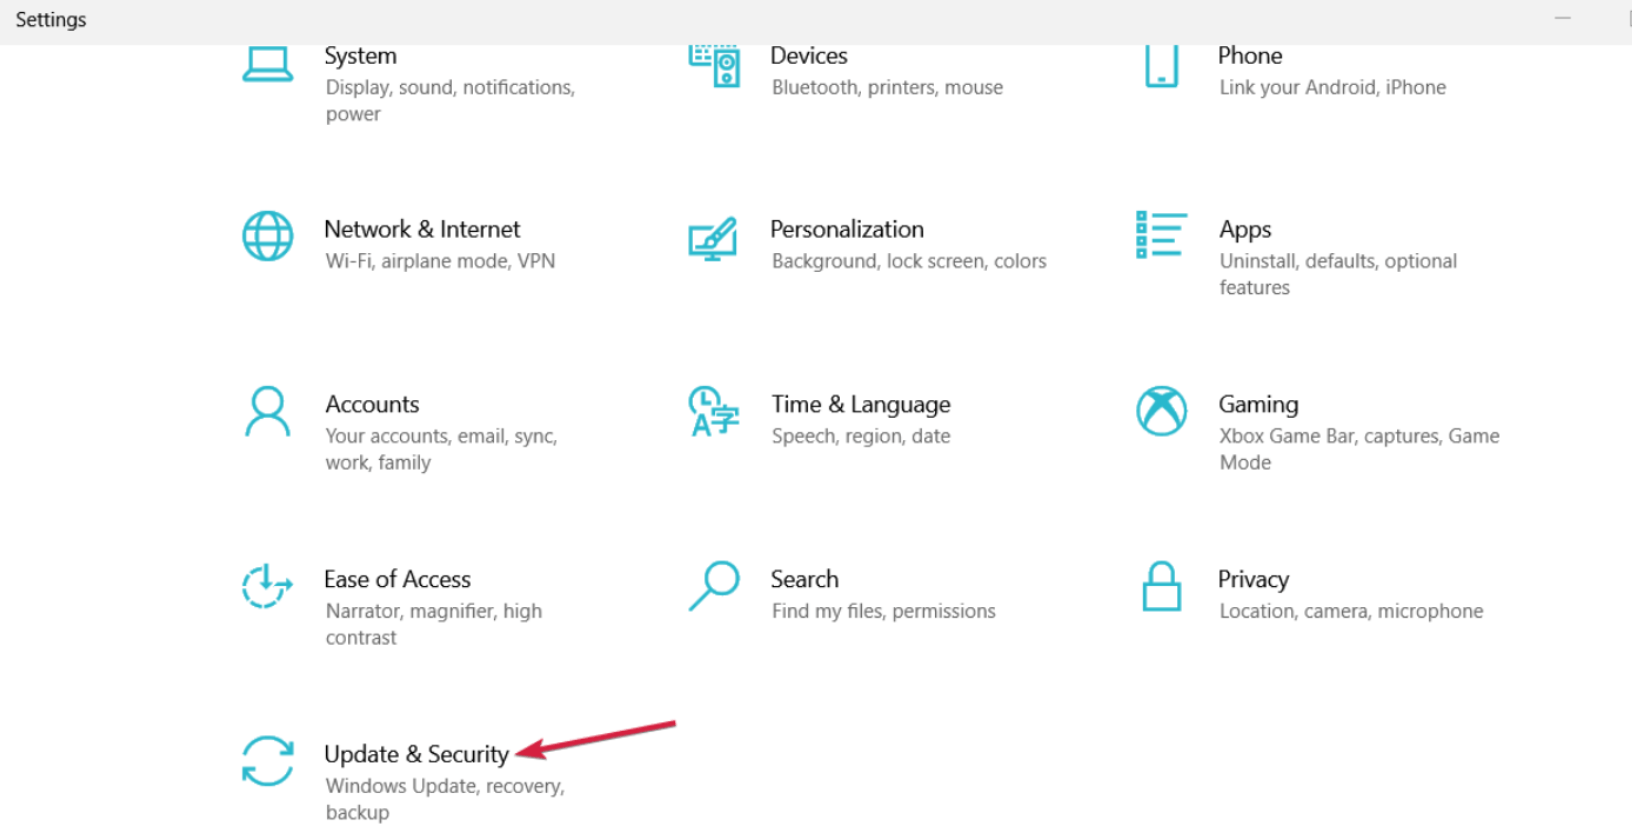
1. For access to Settings, click Start.
2. Update & Security is a menu option found under Settings.
3. Choose Troubleshoot from the left navigation bar.
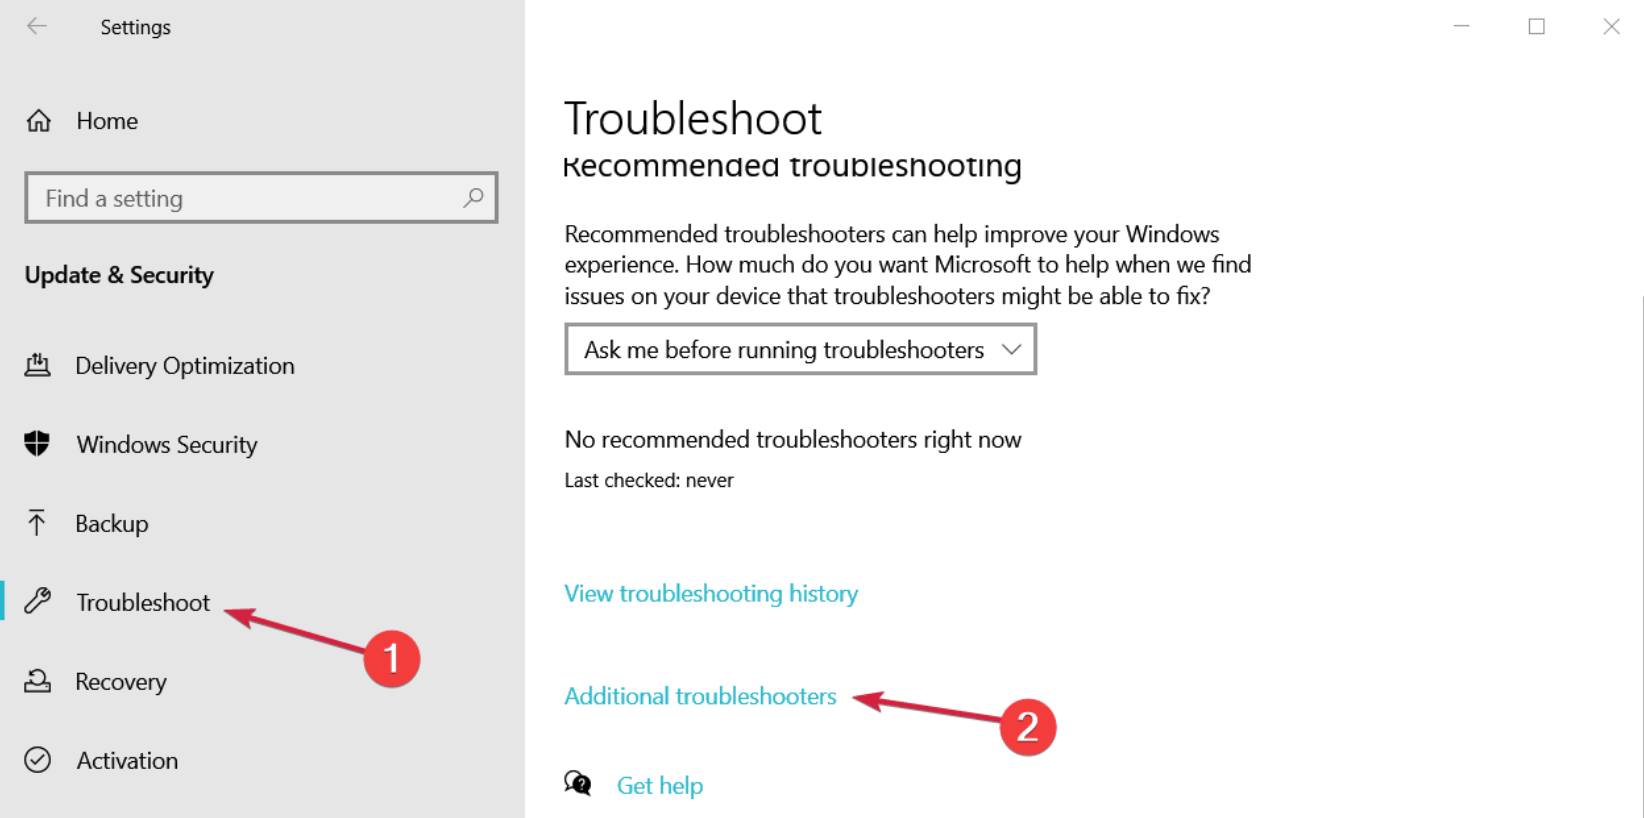
4. Click Windows Update in the Get up and running section.
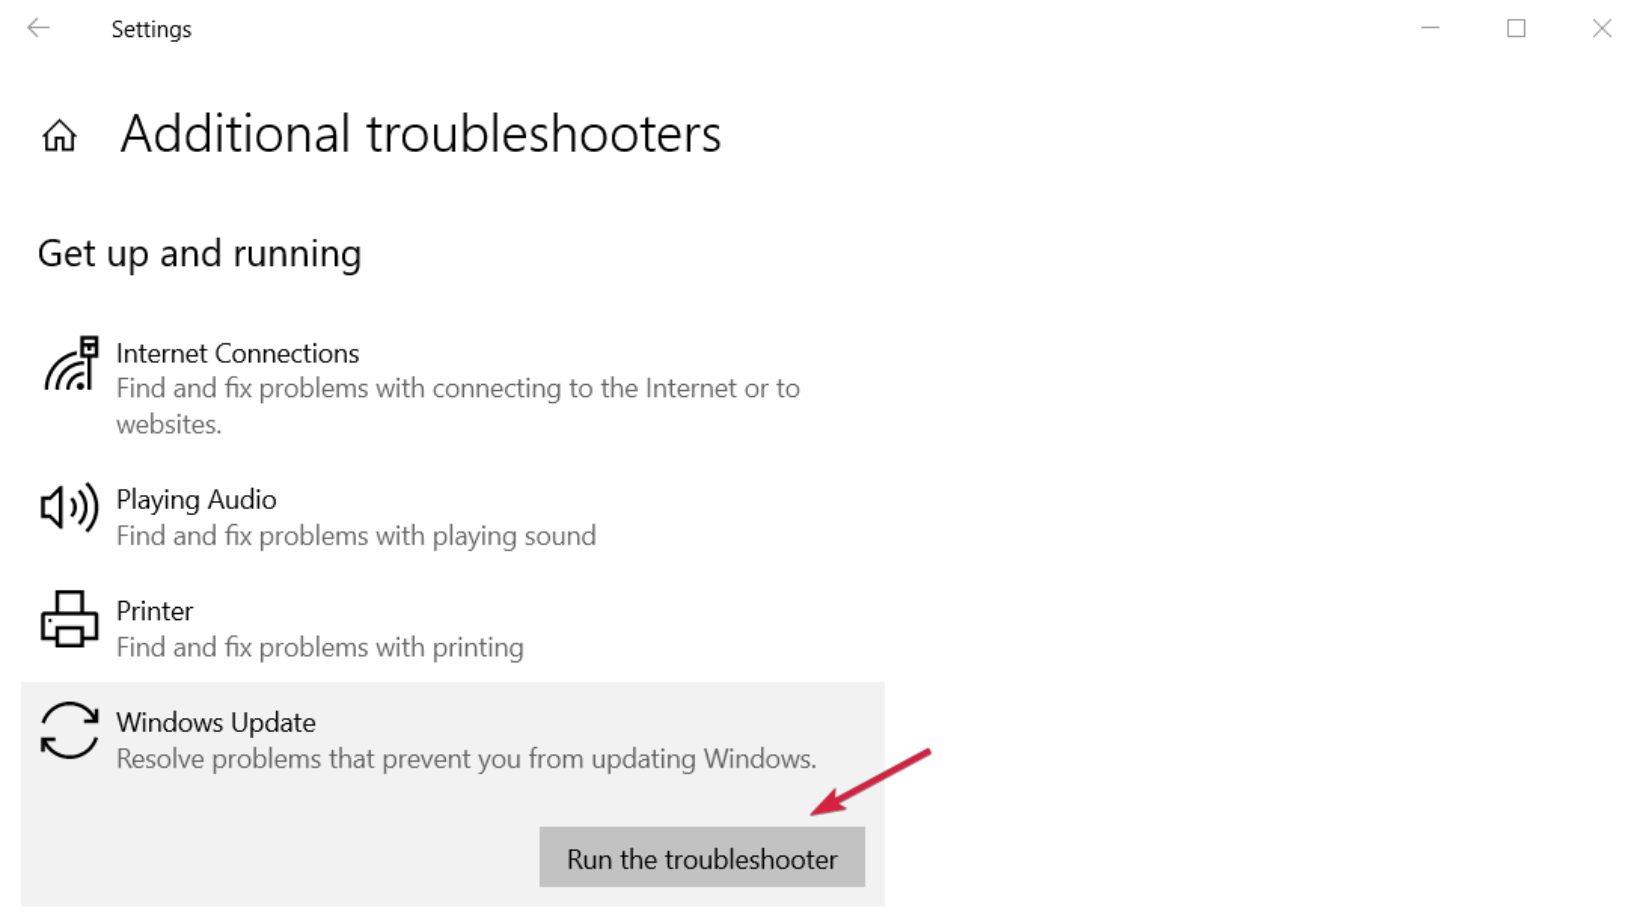
5. Restart your computer after the troubleshooter has finished identifying and fixing faults.
2. Reset Windows Update Components
You must clear the SoftwareDistribution folder in order to start over with the Catroot2 folder.
Clear the SoftwareDistribution folder
The SoftwareDistribution folder in the Windows operating system is used to temporarily store data that might be needed to install Windows Update on your machine. You could find it in the Windows directory. As a result, Windows Update mandates its usage, and WUAgent keeps it up to date.
Launch the Command Prompt program from the WinX Menu in Windows 10 to remove the contents of the Software Distribution folder (Admin). Enter after entering each of the following:
net stop wuauserv
net stop bits
As a result, both the Windows Update Service and the Background Intelligent Transfer Service will be turned off.
Delete everything in the C:WindowsSoftwareDistribution folder right away.
To select every item, use Ctrl+A, then select Delete.
Restart your device if you are unable to remove some files because they are still active. Repeat the aforementioned steps after starting up again. The files in the aforementioned Software Distribution folder can now be deleted.
By entering each of the following instructions one at a time in the CMD window and clicking Enter, you can restart your computer or the services associated with Windows Update.
net start wuauserv
net start bits
That folder will now acquire fresh content as it has been flushed.
Catroot2 folder
The Windows operating system's catroot and catroot2 directories are necessary for the Windows Update process. The catroot2 subdirectory assists with installation when Windows Update is enabled by keeping track of the Windows Update package's signatures.
During the updating process, the System32catroot2edb.log file is used by the Cryptographic service. Automatic Updates uses the updates that are kept in the SoftwareDistribution folder to upgrade the system.
Many Windows Update issues can be resolved by clearing the cache or erasing the contents of the catroot2 folder.
Follow these steps to get rid of the catroot2 folder:
One at a time, enter each of the following commands into a higher-level Command Prompt:
net stop cryptsvc
md %systemroot%\system32\catroot2.old
xcopy %systemroot%\system32\catroot2 %systemroot%\system32\catroot2
Next, delete everything from the catroot2 folder.
Once you've done that, type the next command into the CMD windows.
net start cryptsvc
3. Delete the Windows Update Cache
The downloading and installation of a Windows Update may be hampered or interfered with by previously installed faulty or incomplete Windows Update files.
Delete $Windows.~BT & $Windows.~WS folders if they are present on your computer.
Check to check if your problems have been resolved if this.
4. Turn off your antivirus
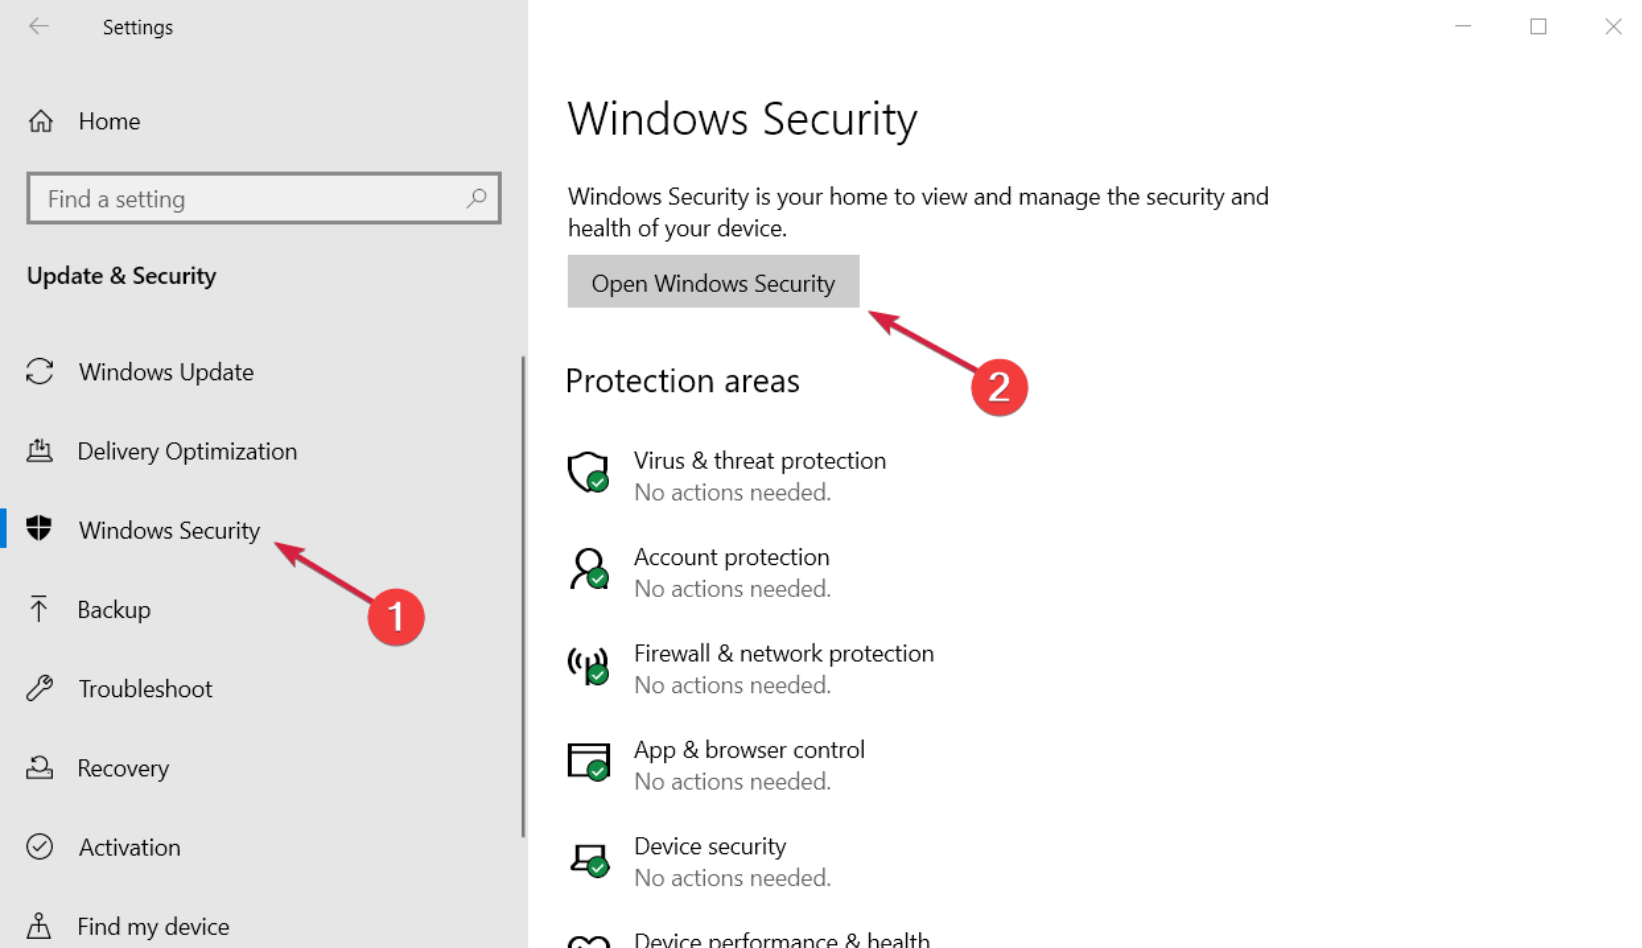
1. Click the Settings option under the Start menu.
2. For security and an update, click.
3. After choosing Windows Security from the menu on the left, click Open Windows Security in the right panel.
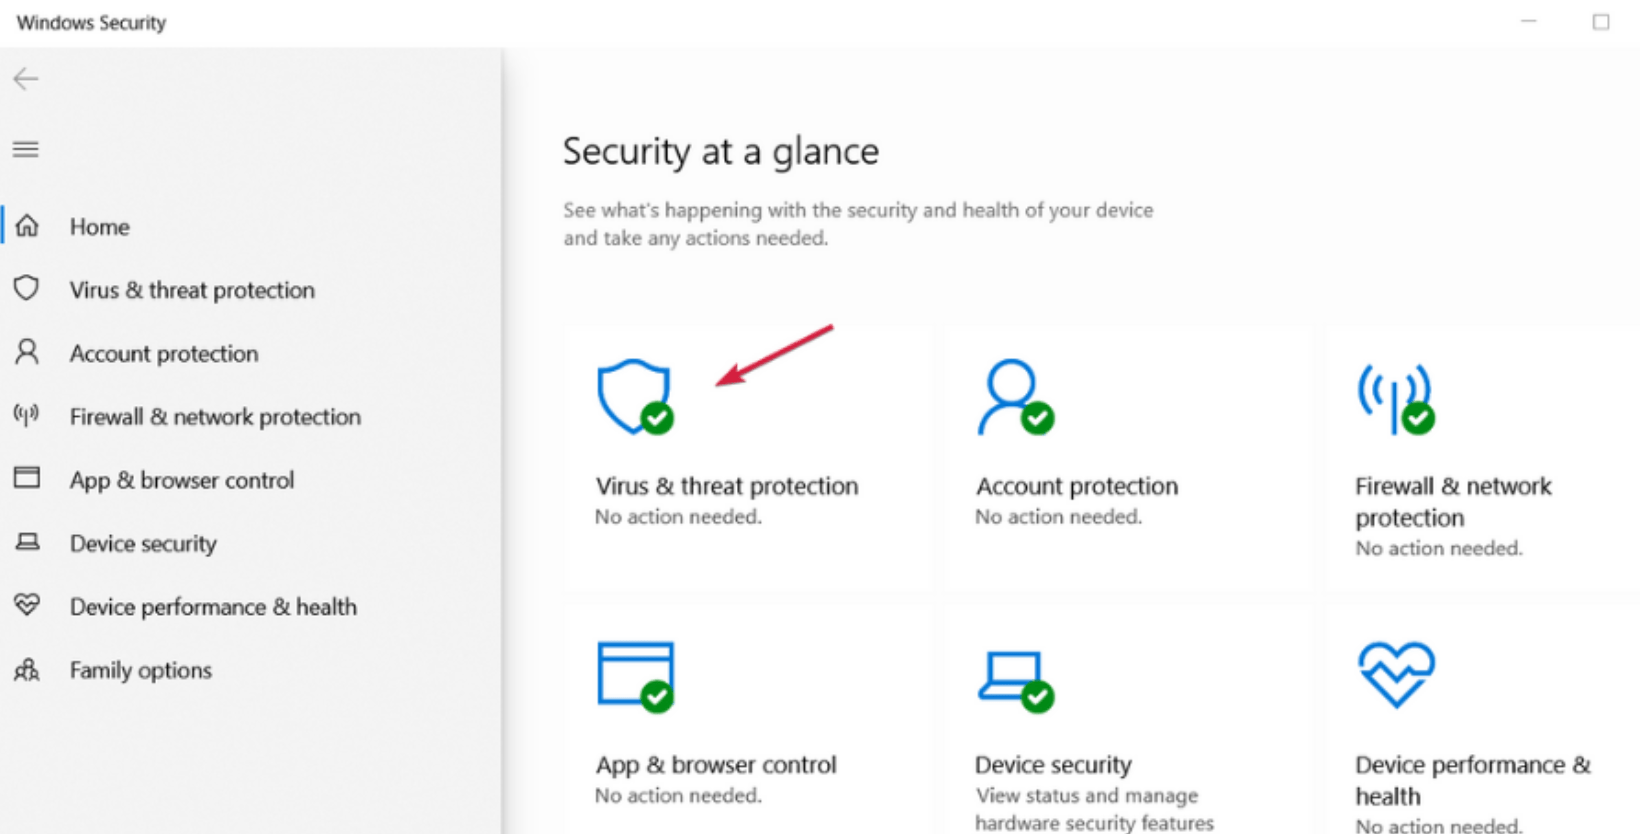
4. Choose danger and virus prevention.
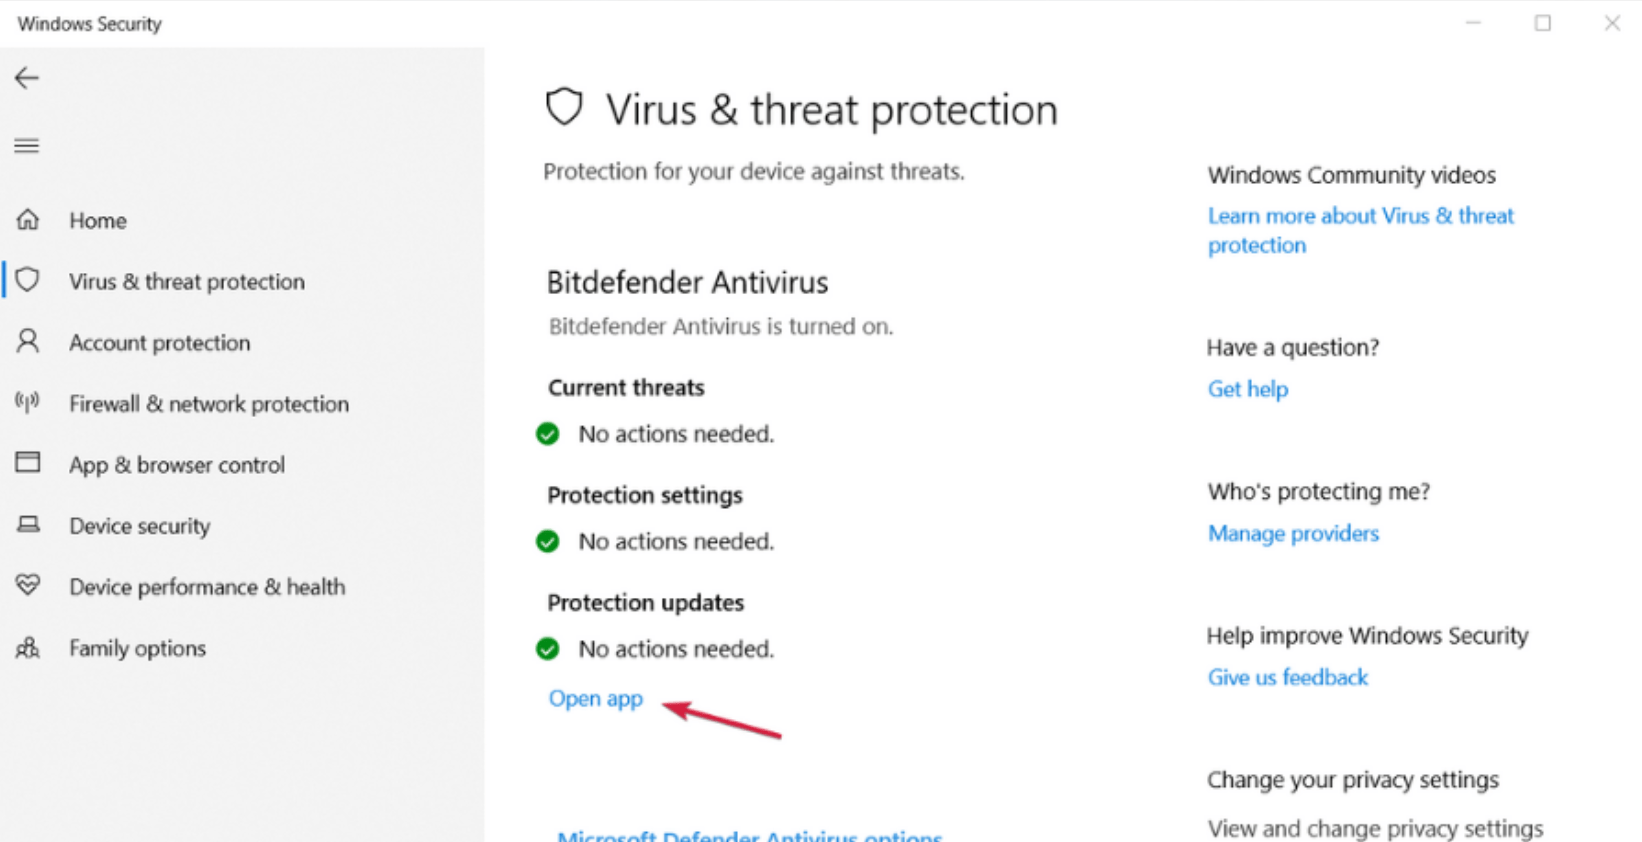
5. Disable Windows Defender protection by selecting Virus & threat protection options if you don't already have a third-party antivirus program installed. If so, choose Open app to open the antivirus menu.
6. The antivirus's deactivate button is typically found under the Security settings, however the exact location varies depending on the antivirus.
Your antivirus product may occasionally interact with your system and result in the 0x8007001F error while providing protection against infection.
It is suggested that you modify your antivirus settings and turn off specific capabilities to resolve the issue. You might need to temporarily turn off your antivirus if it doesn't work.
In the worst-case situation, your antivirus application could even need to be totally removed from your computer.
5. Uninstall the audio drivers
1. Select "device management" from the search results after clicking Start and selecting the program.
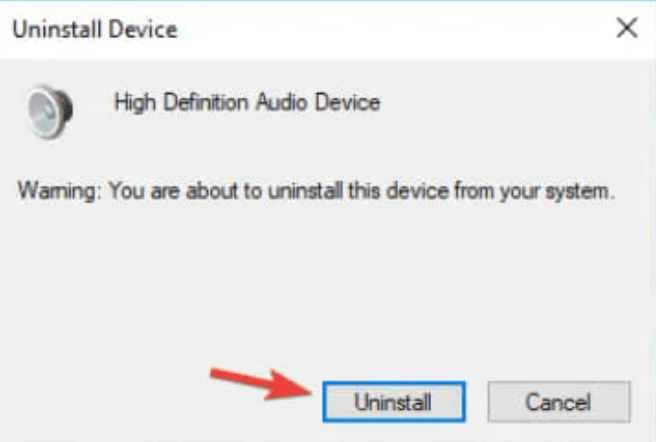
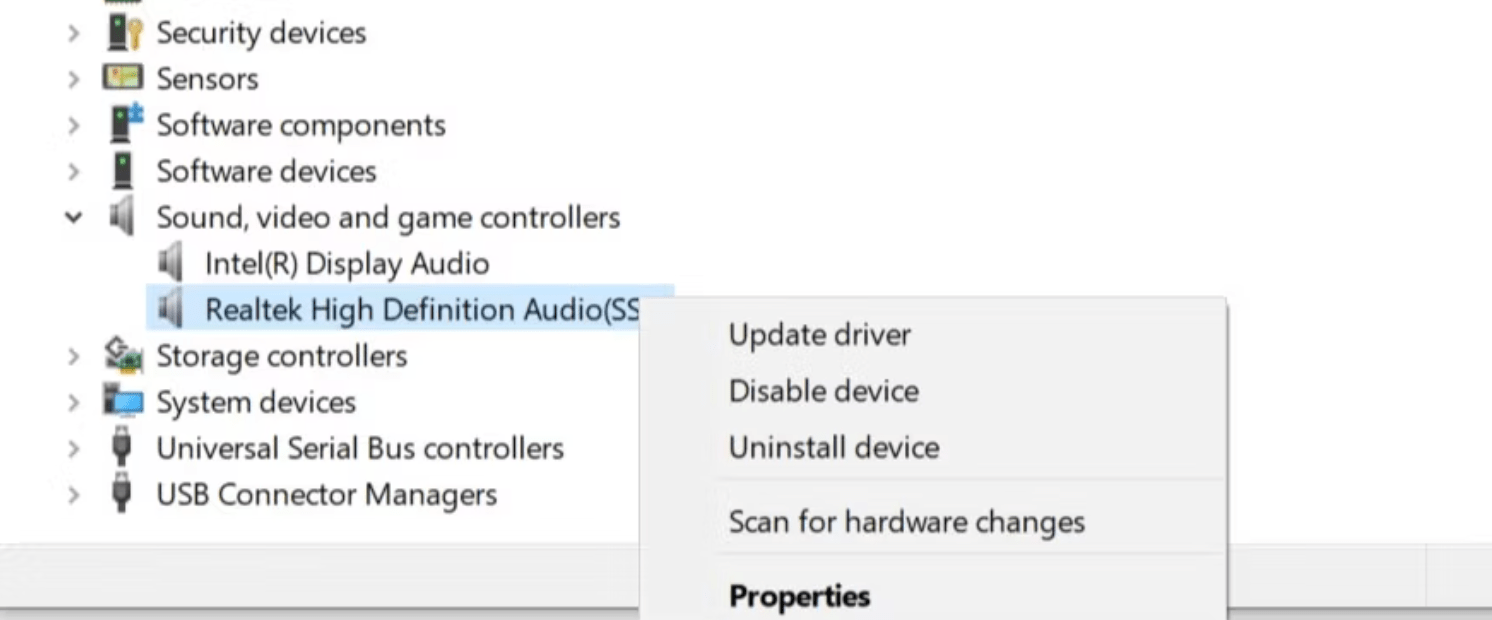
2. Select Uninstall device from the context menu when you right-click your audio device in the Sound, Video, and Game Controllers section.
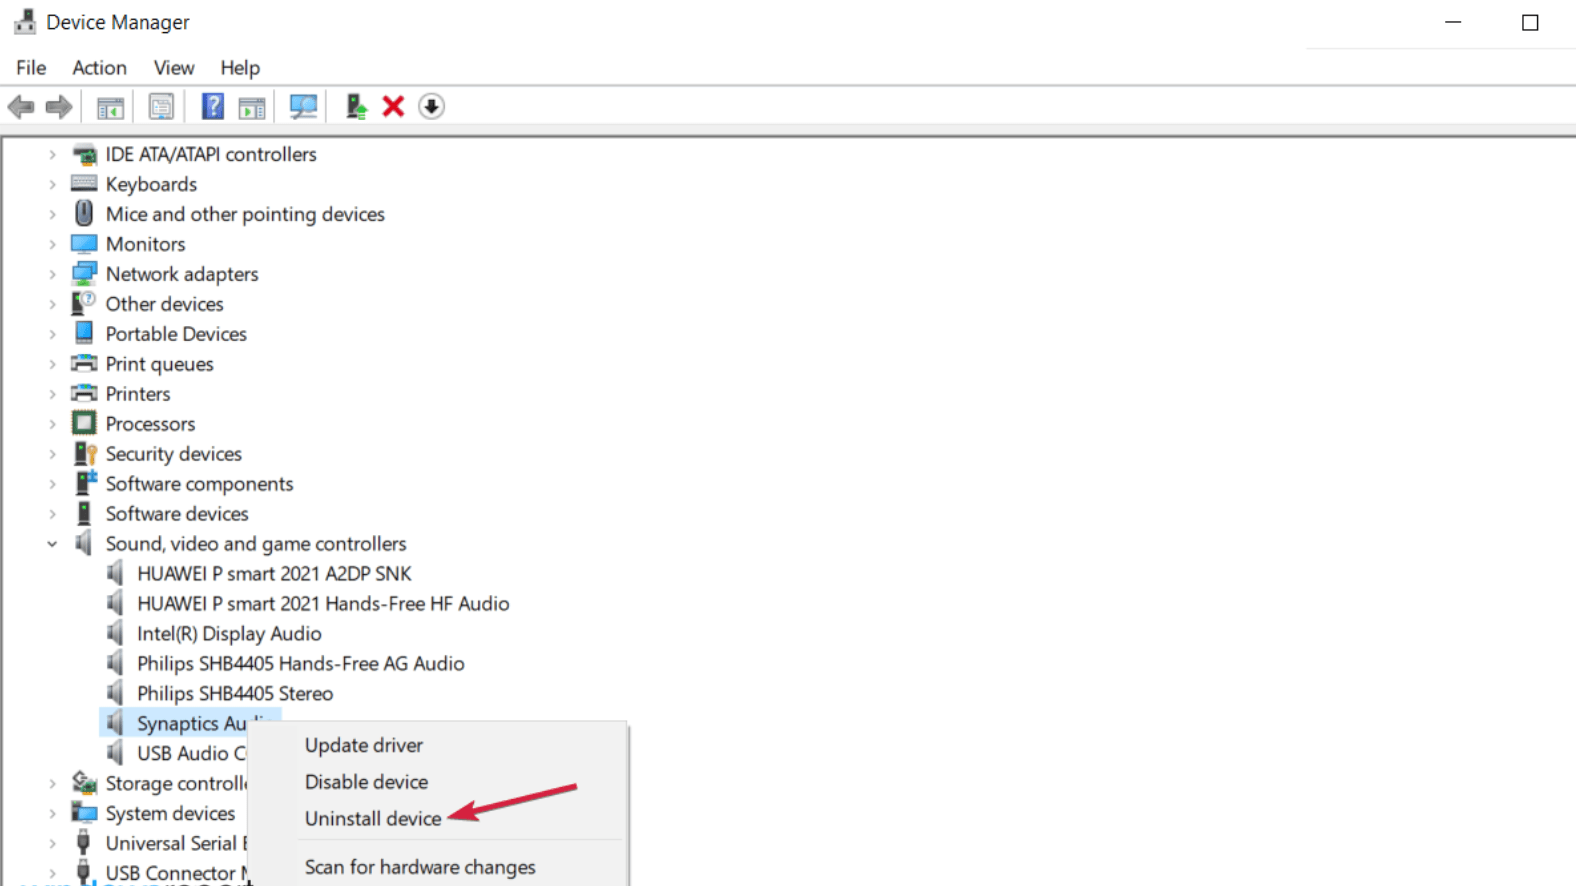
3. Find the option to remove the device driver software if it is present. Select Uninstall at this time to uninstall the driver.
Users assert that occasionally, your audio drivers may be to blame for issue 0x8007001F on your PC. This problem might be brought on by corrupt or out-of-date audio drivers.
After that, you want to look for the most recent audio device drivers. To get the most recent drivers, just go to the manufacturer's website for your motherboard or sound card.
Check to see whether the problem has been addressed after that. To avoid downloading and installing the wrong driver versions, which might permanently harm your PC, we strongly advise using DriverFix.
This application will automatically download all of your PC's outdated drivers and help you resolve the issue with only a few clicks.
6. Run Windows Updates in Clean Boot State
A system is started using a clean boot, which uses the fewest initial drivers and applications as is practical. In clean boot mode, the default pre-selected set of drivers and start software are used when you turn on the machine. A few drivers are included in the system, therefore certain programs might not work as you had hoped.

After entering the Clean Boot State, you can try to start Windows Update to see if it fixes the problem.
7. Manually Install the Available Updates
If you start receiving the 0x8007001F error after installing a recent security patch, there can be an issue with the cumulative update itself. In such circumstances, we advise returning the OS to its default settings.
It is also possible to manually download and install the most recent Standalone package on the computer. To do this, you must first determine the current CU number that matches to your system architecture. Check the Cumulative Update Catalog to see if there is a fresh fix available. Once you obtain the required "KB" value, you may download and install the.msu file by following the procedures below.
8. Use System Restore Points
Occasionally, if you make significant modifications to your Windows 11 or 10 PC, you can encounter a problem. Anything might be the issue, such as a recurrent system crash or a blue screen error. If so, using a previously made restore point will allow you to undo the most recent modifications.
Continue reading to fully comprehend it by doing as instructed:
- Enter a restoration point to start, then enter Enter to go back to a prior condition.
- To see the System Properties dialog box, press Enter.
- Click Next to continue after choosing System Restore from the protection tab.
- Your computer will display the most recent system backup under the "suggested restoration" heading.
- You have the option of picking it or picking an alternative restoration point.
- Choose Next.
To see the programs that will be deleted if you proceed with the restore point, be sure to select Scan for impacted programs in the lower portion. The only applications that will be lost are those made after a restore point was established.
- After choosing Close, click Finish to start regaining functionality for your device.
- At the conclusion, click Finish to finish this activity.
Then, your PC will immediately revert to its normal settings, allowing for a smooth restart.
9. Try SFC & DISM or clean boot
Run a quick SFC scan
Click the Start button, type cmd, and then select Run as administrator to start Command Prompt with all of the appropriate rights.
To run this command, open Command Prompt and type the following:
sfc /scannow
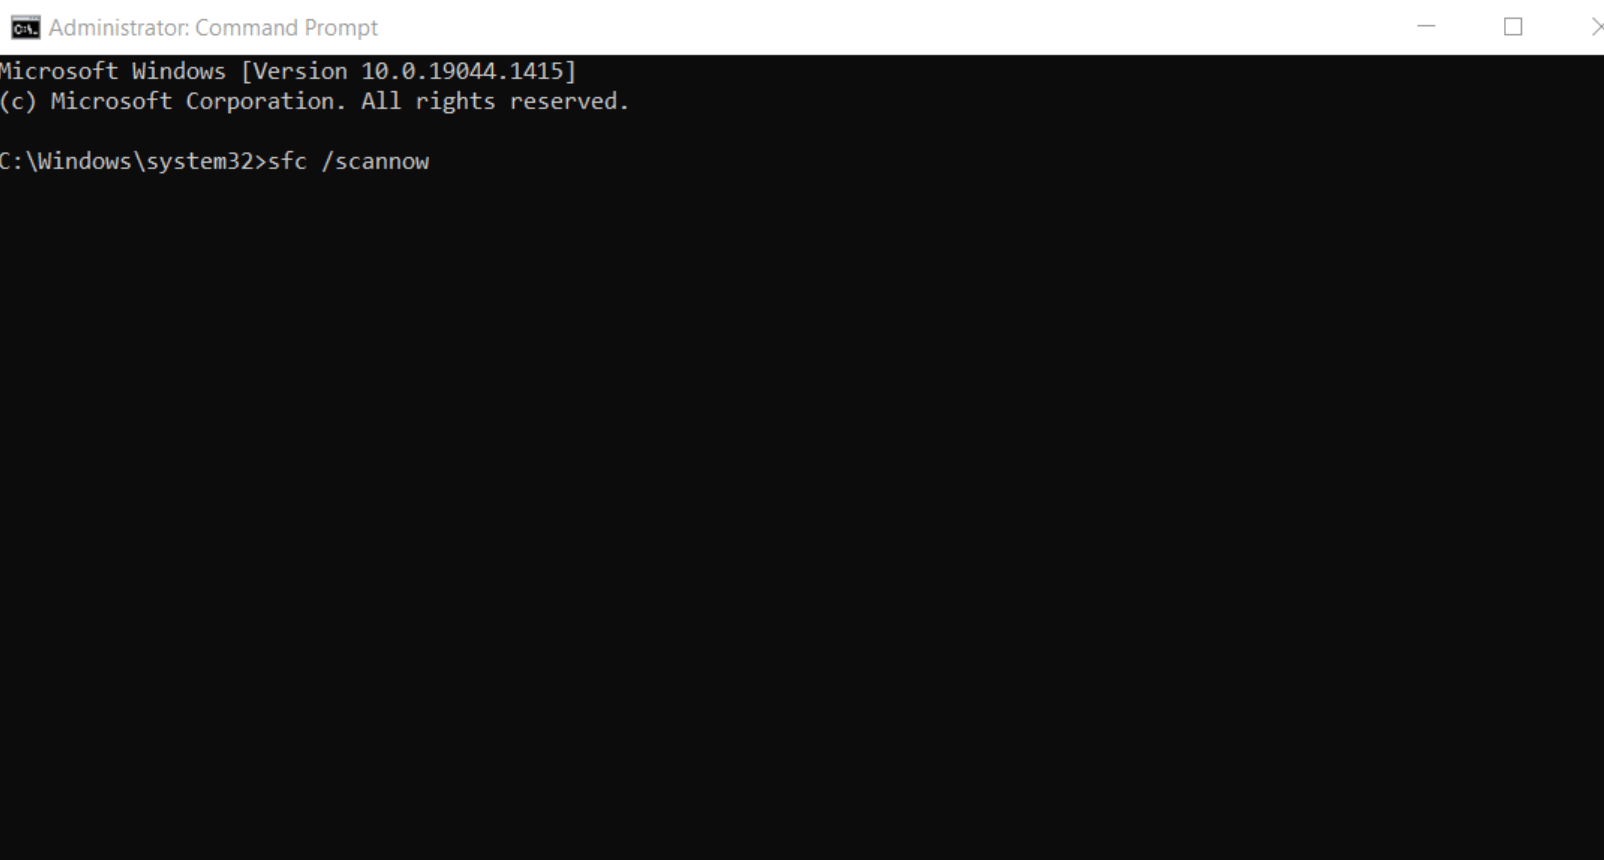
The SFC scan will start soon. This scan might take up to 15 minutes, so please don't disturb it.
Error 0x8007001F can occasionally be brought on by system file corruption. We advise performing an SFC scan in this case and repairing your files.
When the SFC scan is finished, check to see if the problem has been resolved. If you need assistance with this step, look at our tutorial on what to do if you are unable to use Command Prompt as an administrator.
System update problems and file corruption are closely related. For instance, virus outbreaks may cause certain system files to be deleted or quarantined.
By following the steps mentioned below, you may utilize DISM (Deployment Image Servicing and Management) to check for damaged files and resolve the issue.
Run a DISM scan
1. Choose Run as administrator from the list of search results that display when you click Windows and input cmd.
After you've written the command, enter it to execute it:
DISM.exe /Online /Cleanup-image /Restorehealth
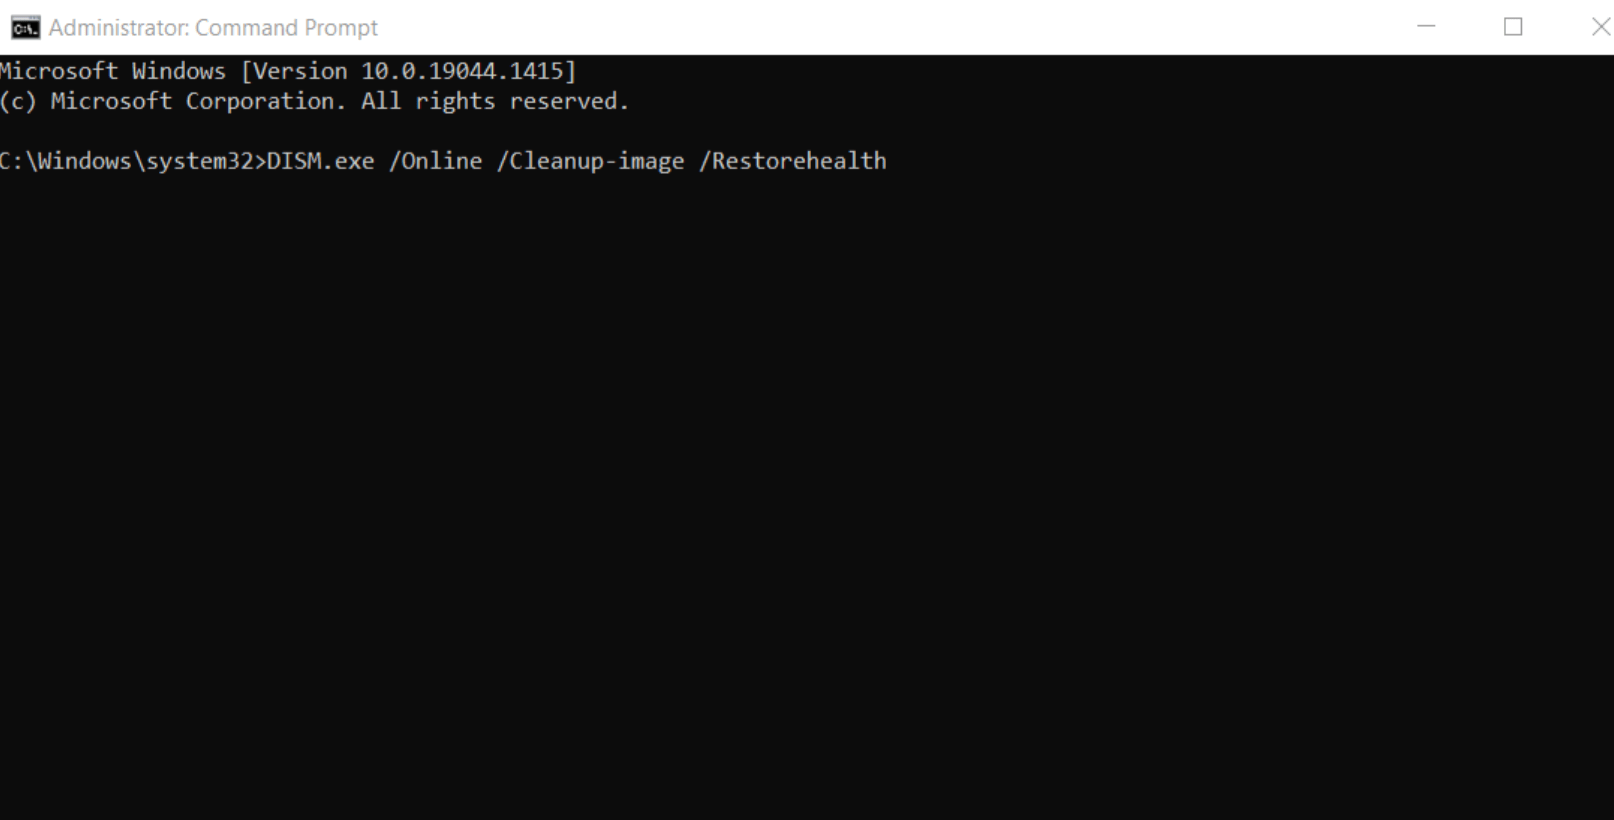
3. The scanning will take a couple of minutes so don’t interfere with the process.
10. Create a new user account
1. Under the Start menu, select Settings.
2. Select the Accounts tab after launching the Settings app.
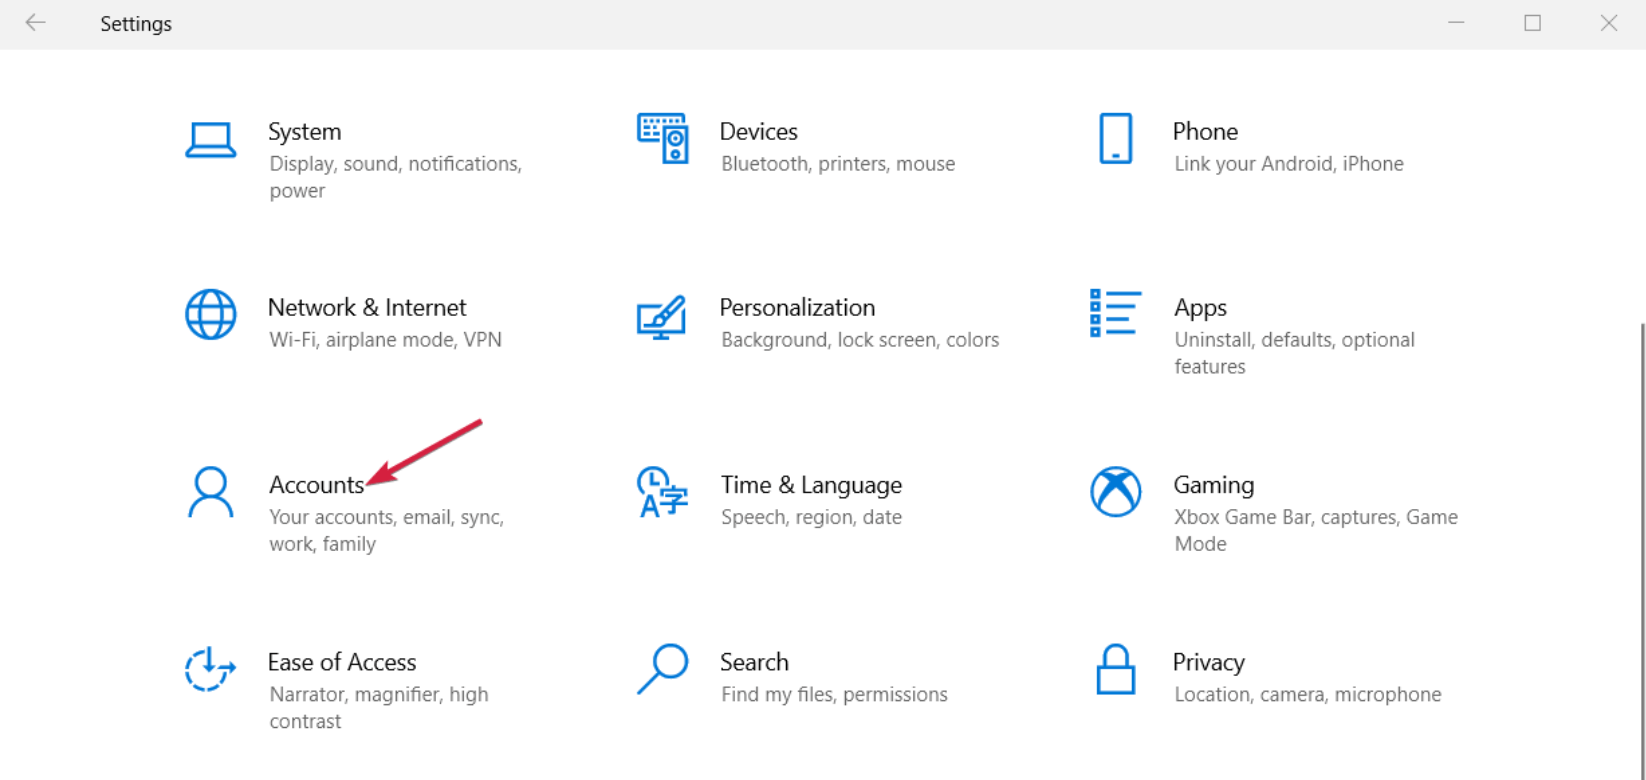
3. Click Add Someone Else to This PC after choosing Family & Other People in the left pane.
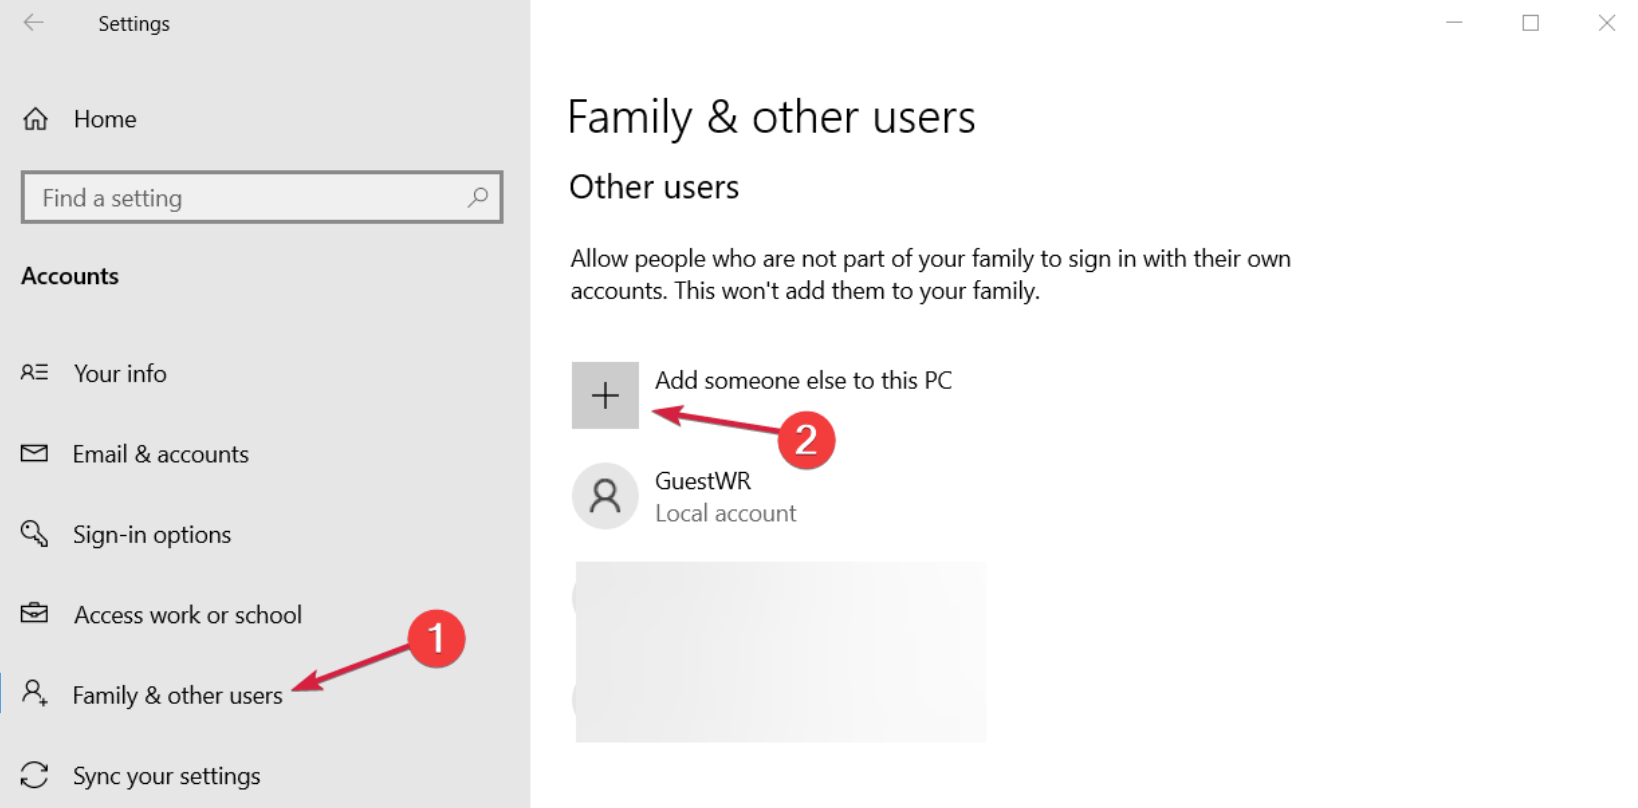
4. Pick The login information for this person is also unknown to me.
5. Select You can add a user who doesn't have a Microsoft account.
6. Press Next after selecting a user name.
If you encounter error code 0x8007001F, your update problems can be caused by a corrupted user account. However, you might be able to avoid this issue if you just make a new user account.
11. Perform an in-place upgrade
In the event that none of the aforementioned workarounds succeed and you don't have a system backup on hand, your only option is to completely reinstall Windows on the computer. Here is a complete explanation on how to achieve that:
1. After downloading the Media Creation Tool to your PC, run it.
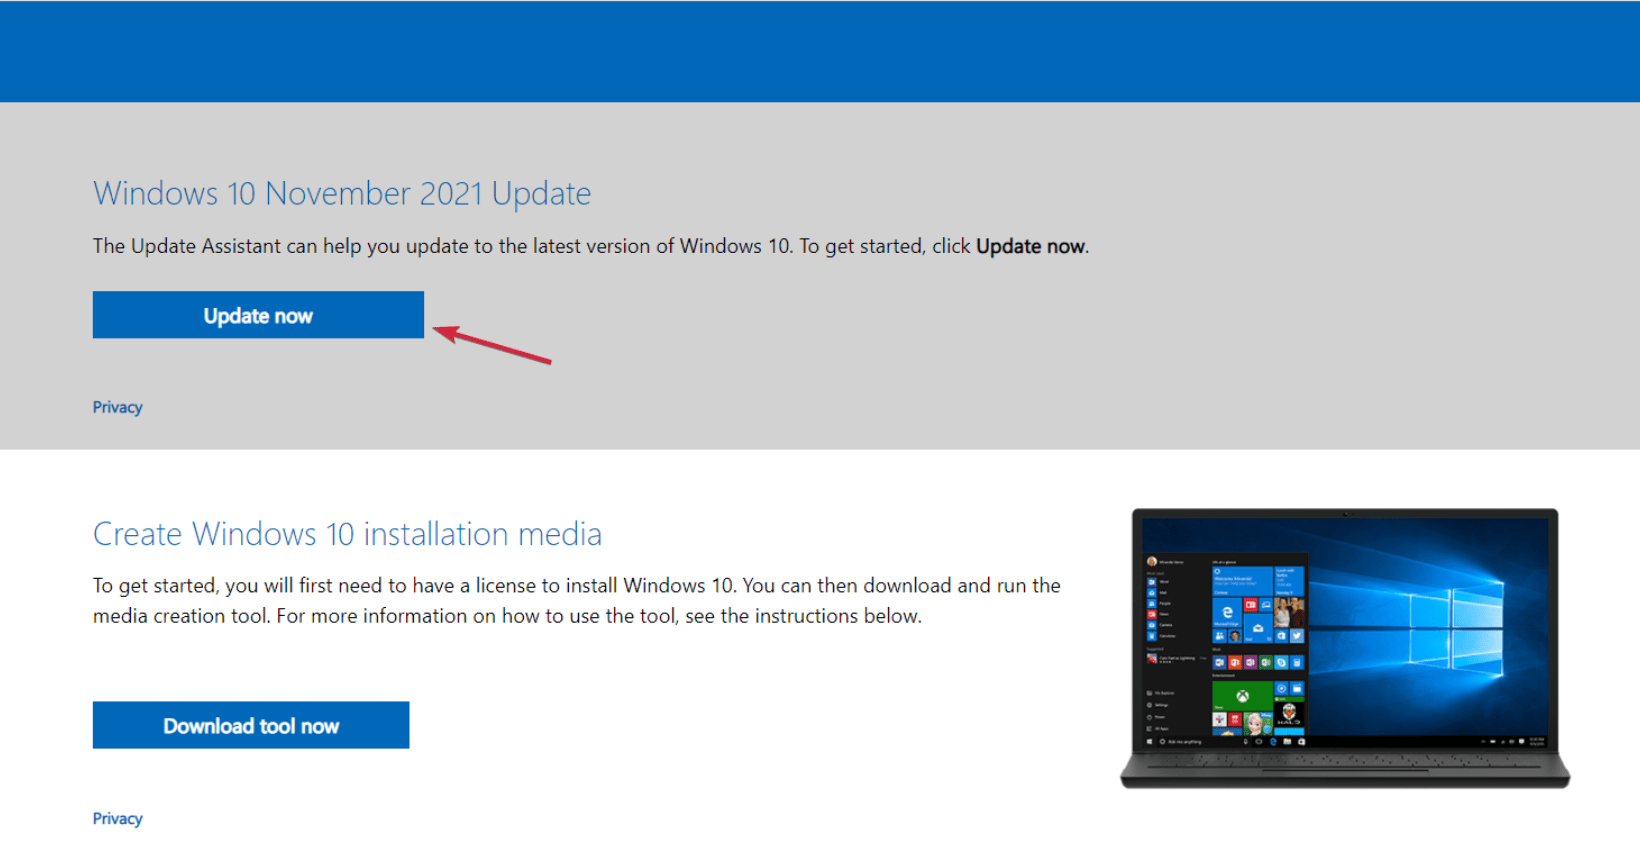
2. Select Upgrade this PC now after that.
3. Wait patiently while the system checks for any incompatibilities.
4. Select Download and Install Updates (recommended) when any results show up, then click Next.
5. To go to the Ready to Install window at this point, adhere to the on-screen instructions.
6. Make sure "Keep personal files and programs" is chosen, then click Next once more.
Make sure your data is safe - use DiskInternals Partition Recovery
This software is the leader in its market and helps to recover files of any kind and size. The program works with all common USB flash drive file systems, including FAT, NTFS, FAT32, etc. If you are recovering files for the first time, you have nothing to worry about because Partition Recovery tool is equipped with a Recovery Wizard.

You can use a fully functional trial version of the program for free, and then simply purchase a license to save the recovered information. To recover files from a damaged external or internal drive, you just need to follow the step-by-step instructions given below.
- 1. Download and install DiskInternals Partition Recovery on your device (computer or laptop).
- 2. The Recovery Wizard will start automatically and will accompany you at all stages to help you recover files from a USB flash drive or hard drive. You will be prompted to select basic options for extracting data, such as the file system (it will be detected automatically, you just need to check it) and how to open the flash drive (fast scan, full scan, reader).
- 3. The next step is the scanning process; it will take some time, depending on the size of the disk (wait for the process to complete).


- 4. Preview and recover files from an unreadable disk. View all the files you are interested in or some of the found files by clicking on one of them with the right mouse button; select "Preview in new window". Yes, this feature is also free for all customers.


- 5. Save your data; for this, you just need to buy a license and enter the license key. It is best to save the files to another storage device to prevent overwriting of the saved data.
- Tip: how to use deleted partition recovery tool properly