FIX: Windows 10 Black Screen with Cursor issue, after Update

When something goes wrong with the graphics drivers, monitor connection, BIOS setup, etc., you could get a black screen with a cursor. When a serious system fault is discovered, the operating system may shut down completely and the system can no longer function securely. Despite how bad this circumstance is, it can be resolved. Here are the best solutions you may use on your own to fix the issue "black screen with pointer Windows 10".
In this article you will find out:
- about Windows 10 black screen with cursor
- efficient solutions for this issue
- how to protect your data
Are you ready? Let's read!
TOP 16 ways to fix Windows 10 Black Screen with cursor problem in 2025
Here is few methods that can be helpful and any of them can be your solution.
1. Remove Battery & Long-Press the Power Button (Laptops Only)
You can remove the battery from your laptop to see if it resolves the "Windows 11/10 dark screen with cursor" problem. These are the recommendations:
- Turn off your laptop first. Remove the battery.
- Hold the power button down for 60 seconds while removing the battery.
- After changing the battery, restart your computer.
- Try the following options if this doesn't work or you use a desktop computer.
2. Use shortcuts
It happens that after upgrading to Windows 10, the mode of your project can only change to the Second Screen. In this case, you can try using the Windows Key + P keyboard shortcut to switch displays; take a look at this detailed guide.
Press the Windows Key + P keyboard shortcut - you will be taken to the Project menu. If this menu does not appear, you need to press the up arrow key several times and press Enter. In POSSIBILITY, you will have to repeat this step several times (6-10 times).
If your account is password-protected, you must first log in, press the space bar or the Ctrl key, enter your password, and press Enter.
3. Reconnect your monitors
You need to disable Dual Monitor in BIOS. To do this, while the computer boots up, press F2 to access the BIOS. Next, find and disable the graphics processor function or the dual monitor function and be sure to save the changes.
Without leaving the BIOS, disable the CPU Graphics Multi-Monitor option, if you have one.
If you have a monitor with two connectors such as DVI and HDMI, you must connect your monitor using the DVI and HDMI cable. Once you've done that, you can turn on your computer and check if the problem is resolved. There is also information that connecting an additional monitor may solve the problem with a black screen with a cursor.
Alternatively, you can change the brightness of the display:
Press Windows Key + X and select Power Options.
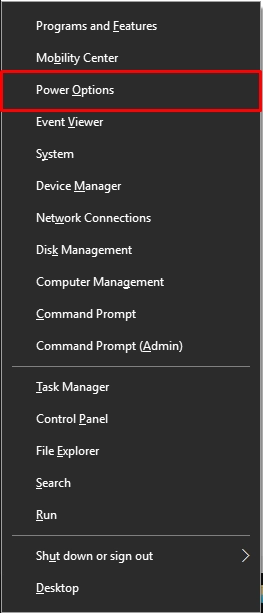
Select the appropriate result with the left mouse button. In the new window, find your current plan and click Change Plan Settings, and then click Change Advanced Power Settings. You will need the Display Brightness parameter; make sure you set the display brightness to 97% or 98% when your device is online. Under any circumstances, do not set the display brightness to 100% when your device is connected - this may cause the “Windows black screen with cursor after login” problem.
If you are using two monitors, disconnect the second monitor. This is especially true for NVIDIA users.
You can also try connecting your monitor to your computer using an HDMI cable instead of a DVI cable, and this will fix black screen problems.
4. Update BIOS
Updating the BIOS may well solve your problem, but it should be done properly. If you do not have enough skills and experience, and you are doing it for the first time, then you can cause irreparable damage to your equipment.
If you nevertheless decide to update the BIOS yourself without the help of specialists, then you need to go to the motherboard manufacturer's website and download the latest BIOS version for your motherboard. There should also be instructions on how to update the BIOS, so be sure to read it.
You can remove the computer battery and reset the BIOS, but again, this must be done with caution and experience. Please note that you will void the warranty by doing so.
5. Delete third-party software
Certain third-party applications (such as antiviruses, third-party firewalls, VPN programs and etc.) can cause the computer screen black with cursor issues.
If you have such applications, it is recommended you uninstall them from your computer. To achieve this, open in Safe Mode Task Manager and select the File tab. Next, click Run new task and enter appwiz.cpl and press Enter. The Programs and Features section will open, displaying all applications.
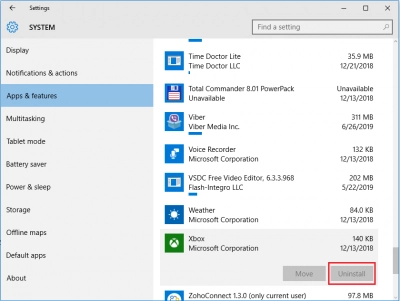
Remove the problematic programs by right-clicking on them and selecting Uninstall.
6. Work with ports
You can try disabling the auxiliary output if you do not plan to use two or more monitors on your computer. In Device Manager, locate and expand the Display Adapters section. Click the View tab and select Show Hidden Devices.
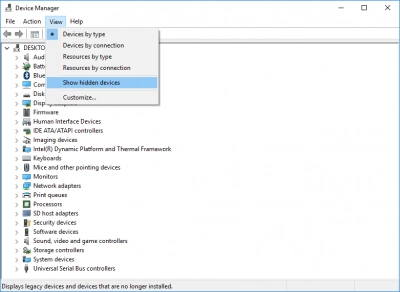
Next, in the Display Adapters section, find Secondary Output, right-click it, select Disable, and restart your computer.
7. Check startup options
The quick-start feature is great, but it can cause black screen problems. In this case, you just need to disable this option.
In the Control Panel, open the System and Security section and select Power Options. Then go to "Choose what the power button does" and click on "Change settings that are currently unavailable."
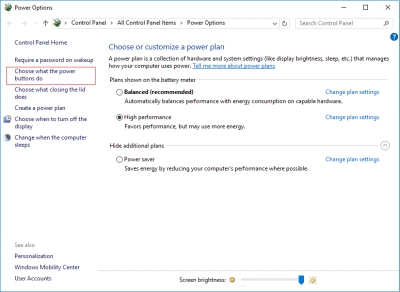
Now, uncheck "Turn on Fast Startup (Recommended)" and save your changes.
8. Check for technical issues
The main reasons of the black screen with a cursor include a wide range of technical problems, including a damaged connection cable, a broken monitor, a dual monitor problem, etc. We thus urge you to verify the essentials once more before continuing and attempting to access Safe Mode:
- Check for issues with your connections. Make sure the cable connecting your computer to your monitor is in place. You should also visually check cables for damage (note, do that while the computer is off).
- Attaching your computer to a second display will allow you to check it out. The monitor needs to be replaced or fixed if the latter is true.
- Any external devices, such as cameras, phones, printers, etc., should ideally be turned off. Check to see if restarting your computer may solve the issue.
- If you're using a battery, turn your laptop off and take it out of the case. After holding down the Power button for 60 seconds, recharge the computer's battery before attempting to get back into Windows.
- If you are using more than one display, pick PC screen by pressing Win + P.
9. Reboot in Safe Mode
If none of the above listed fixes for the black screen with a pointer resolved the issue, you should enter safe mode by performing the following:
- Switch off your computer.
- Once the Windows logo displays, shut down your computer by pressing the Power button.
- Your machine should enter Advanced Startup mode on its own after carrying out the preceding two steps twice more.
- Choose Troubleshoot > Advanced options > Startup Settings and Restart after that.
- After another reboot, use F4/4 to boot into Safe Mode or F5/5 to boot into Safe Mode with Networking.
You should be able to operate your computer normally in Safe Mode. As a consequence, carry out the fixes suggested below. If for any reason you were unable to access this mode, kindly use the following method.
10. Disable the Fast Startup option
The ability to access Windows more rapidly once a computer awakens from sleep mode makes Fast Startup a fantastic feature of any Windows system, technically speaking. This function can occasionally have a lot of negative effects on the computer, such as the black screen with cursor issue. Because it is turned on by default, the majority of users do not even realize they are using the feature. So, follow these instructions to disable it:
- Type "Control Panel" into Windows Search to conduct a search.
- When the Control Panel has loaded, choose the Small icons view.
- Selection of Power Options.
- Type "Choose What the Power Buttons Do from the menu on the window's left side.
- At the top, click the Change options that aren't accessible right now option.
- Turn off the recommendation to enable rapid startup, then click Save changes.
- Check to check whether the issue has been resolved by rebooting normally.
11. Restart the Graphics Driver
Be sure to check your graphics drivers, work with the integrated graphics and video card settings. You need to strain a little to do this:
- 1. You can try pressing Ctrl + Shift + Esc or Ctrl + Alt + Del to launch the Task Manager. Next, click File and select Run a new task from the list, enter devmgmt.msc and press Enter. You will be taken to Device Manager. Here, you will find your graphics card; right-click it and select Uninstall. Next, you need to restart your computer and Windows 10 should start normally.
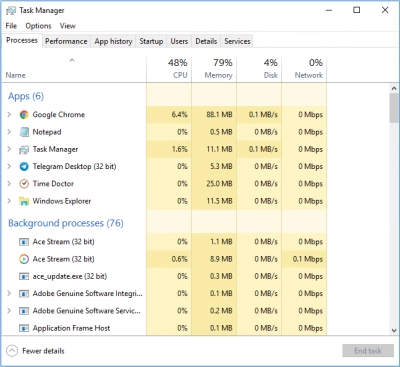
- 2. You can try disabling onboard and dedicated graphics from Device Manager. It's best to do this in Safe Mode, as your Windows 10 won't boot. In Device Manager, find your onboard graphics and right-click on it. From the menu, select Disable, then restart your computer and check if the problem is still there.
- 3. You can try to Disable/Enable dedicated cards from BIOS. So, go into BIOS and find the graphics settings there. Next, you need to decide and choose between the Switchable or Discrete option, depending on which one you want to use.
- 4. You can try changing the video card settings in the BIOS. The Asha graphics card must be configured to use the PCI-E slot (for some reason, sometimes this parameter can be changed to PCI).
12: Run SFC and DISM
SFC and DISM can also be attempted to run in WinRE. Following are the steps:
- 1: Enter WinRE. Navigate to Troubleshoot>Advanced options>Command Prompt.
- 2: Type sfc /scannow and press the Enter key.
You can use DISM to fix system files if SFC is unable to. Each of the following commands must be entered one at a time in order to start DISM.
DISM.exe /Online /Cleanup-image /Scanhealth
DISM.exe /Online /Cleanup-image /Restorehealth
You can check to see whether the "Windows 11/10 black screen with cursor" bug has been fixed when the procedure is complete.
13. Add a new user account
Another solution to this issue is to create a new user account. After installing a new user account, you must update all of your drivers and transfer your data to the new user account.
1. Launch Task Manager by pressing Ctrl + Shift + Enter or Ctrl + Alt + Delete, respectively, and add a new user account.
2. The File menu offers the option to Run New Task.
3. Type netplwiz and press Enter
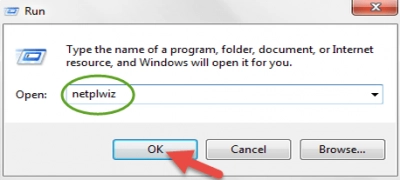
4. Click Add to create a new user account
5. Click Sign in Without a Microsoft Account
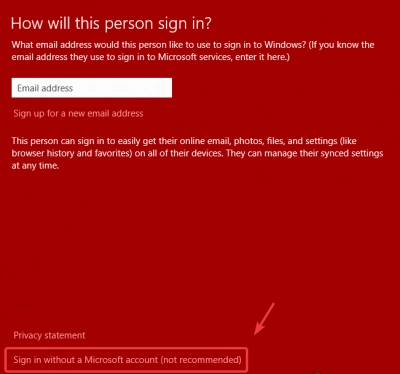
6. Click Local Account and fill out the details then click Next and click Finish
7. Once you created a new local account, on the user account page, select the create a local account then click Properties
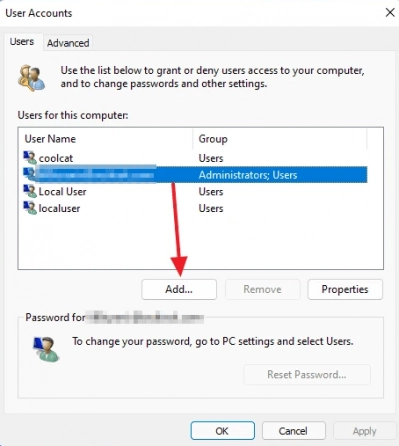
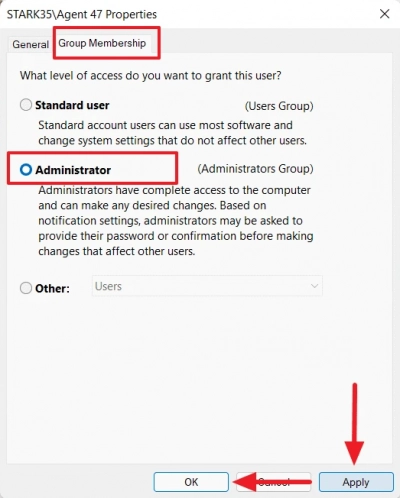
8. Go to Group Membership and select Administrator
9. Click Apply then click OK
Now press Ctrl + Alt + Delete and choose Sign Out.
Once you signed out, now select a different account to sign in again and see if it fixes the issue.
14. Perform a Clean Boot
By starting Windows with the fewest number of initial applications and drivers possible, a clean boot can help you prevent software conflicts. To accomplish it, you must:
1. Click the Windows + R keys, type msconfig in the Run box, and then press Enter.
2. Next, select the Services tab. Select the box labeled Hide All Microsoft Services.
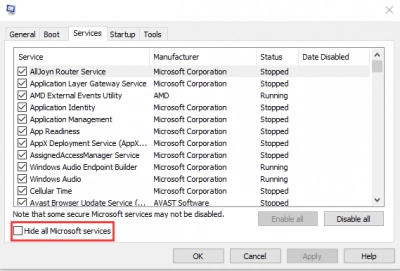
3. Select the Disable all option, then click Apply to save the modification.
4. On the Startup tab, select Open Task Manager.
5. Click Disable next to the first enabled program in the Task Manager tab. Each enabled program must be separately disabled in this case. Once all programs have been deactivated, click OK to close Task Manager.
After that, you can restart the computer. If the "Windows 11/10 black screen with cursor" issue disappeared after a fresh boot, one of the installed apps was probably at blame.
15. Uninstall the Recent update
A bad Windows update is another cause of a black screen with a pointer problem. Although the likelihood of a flawed Windows update is smaller, it is nevertheless suggested to try it since occasionally users install a flawed Windows update due to a sluggish internet connection or for other factors.
1. Press Ctrl, Alt, and Esc at the same time to launch Task Manager and delete a recent Windows update.
2. Click File > Run New Task
3. Type Appwiz.CPL and hit Enter
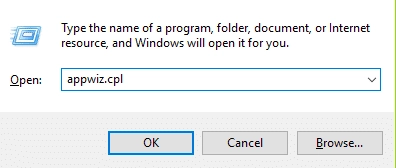
4. Click View Installed Updates from the left panel.
5. Select the recent Windows update and click Uninstall from the top.

6. Once finished, restart your computer to verify whether the problem has been resolved.
16. Run Startup Repair
Windows' Startup Repair function corrects problems with the files needed to make Windows boot correctly. It fixes the issues that stop Windows from starting. The steps for doing startup repair are as follows:
1. It is first advisable to restart your computer by turning it off and back on.
2. Press the power button to turn off the computer when you see the Windows logo.
3. Repeat this process two more times to trigger Advanced Startup options
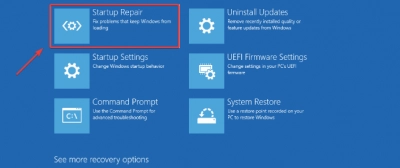
4. Navigate to Troubleshoot > Advanced options
5. Click Startup Repair to start the repair process
What Causes Black Screen with Cursor?
There are several potential causes for the Windows 10 black screen issue, which only displays the pointer. It might be a failing graphic card or a problem with the connections supporting your display. However, it often occurs when a Windows application or other piece of software fails. Some applications affect how Windows starts up, and occasionally a fault in one of those applications prevents Windows from starting up properly.
Protect your data
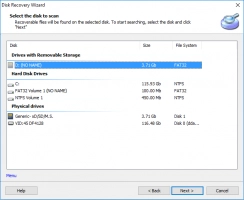
Therefore, if you notice that the data has been damaged or deleted, you need to recover it as soon as possible using DiskInternals Partition Recovery. This professional application has all the necessary functions:
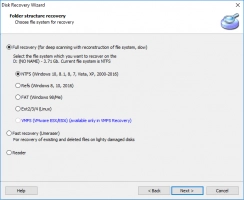
You can recover data in several modes (full recovery or fast recovery, reader mode) depending on your goals. You can open previously inaccessible files, just like in File Explorer, if you don't need to export and restore.
Furthermore, you can create a disk image if you want to use this particular computer configuration in the future; it's simple and free.
This software works with Windows, including 8.10, etc., and also supports file systems: FAT12, ReFS, UFS, HFS, NTFS, ReiserFS, Reiser4, XFS Ext2, Ext3, Ext4. You can download the fully functional free trail version and enjoy the whole real-time recovery process. The recovery wizard in this program opens by default and follows the entire recovery process, so don't worry if you don't have enough experience and skills. You can recover absolutely any file type of any size, and with the free preview function, you can be sure that the data is restored in its original form.
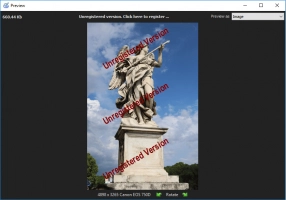
As you can see, there are no hopeless situations with DiskInternals Partition Recovery!

