External hard drive not showing up? Fix it!
There are situations when you trying to connect, but the portable hard drive is not showing up on your Windows. This article has fully dedicated this theme.
Here you will find out:
- all the best and safe methods to solve "HDD not showing up" problem;
- what to do first, if your USB hard drive not showing up in windows 10, 8, 7;
- how Partition Recovery can help you with this problem.
Are you ready to cope with external HDD, that not showing up? Let’s read!
Step 0. Power on your external hard drive and check if the USB cable is fine
If your external hard drive is not showing up, before you take any action, you need to know if your external hard drive has a separate power source. Of course, almost all external hard drives are powered via USB. But not always. Maybe you have a special power cable or physical power switch. In this case, first, connect the external hard drive to a different outlet or try connecting a different cable. Now check to see if the external hard disk drive is already on.
If this advice helped you, congratulations! You don't need to do anything else. If not, read on and you will find a solution to this problem.
Step 1. Try all remaining USB ports or another computer
If the external hard drive is not showing up, perhaps the problem lies in the USB port itself. Try connecting it to a different USB port on the same computer. This USB port may be damaged and not working or, alternatively, there is not enough power to detect an external hard drive.
If the external hard drive is not showing up on Windows 10, connect it to another computer, even one with a different operating system. If this helped, then you were dealing with an incompatibility between the external hard drive and a specific computer’s OS.
If this didn’t help, proceed to the next step.
Step 2. Update or reinstall drivers
Another common cause of an external hard drive not showing up is outdated or damaged drivers. You can go to the manufacturer's website and download the latest updates or update it yourself.
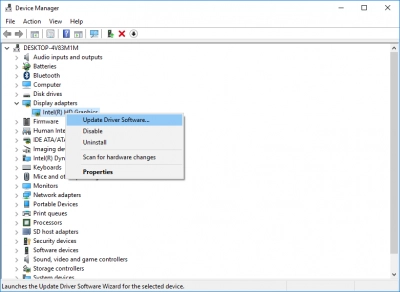
To do this, follow these steps: Press Win + R at the same time. A command prompt opens, where you need to type “devmgmt.msc”. Now find the external hard drive and, if the driver has a yellow or red mark, right-click on it. From the list, select “Search automatically for updated driver software” and click Next. After the update is completed, restart your computer and check whether the external hard drive is displayed. If not, try removing the drivers and reinstalling them again.
Unfortunately, this does not always help.
Step 2.1. Use Windows Troubleshooter
Download Windows Troubleshooter from an official website. It will automatically check your device for possible errors and eliminate them. If after all this, the external hard drive is not showing up, do not panic; go to step 3.
Step 3. Try Disk Management to find and open the external hard drive
Find This PC / My Computer on the desktop and right-click on it. Next, click Manage, then Disk Management. Then find and select the external hard disk and right-click on it; then select Open. If the external hard disk is not displayed in Disk Management, check the external disk connection again.
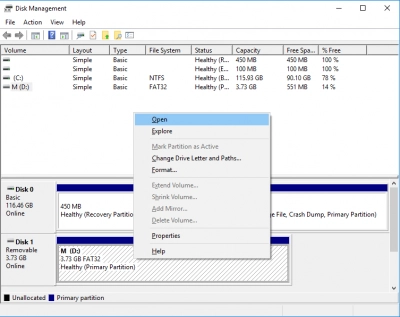
If this method does not help, refer to step 4.
Step 4. The external hard drive still not showing up? Try Partition Recovery
If your external hard drive is still not showing up, you can use professional software. This is probably the easiest and the most reliable way to open an external hard drive that cannot be opened by the previous methods.
DiskInternals Partition Recovery will help you with this situation like no other!
In addition, this software can recover files using two methods. This is very important when you are opening an external hard drive using unsafe methods, and data loss occur.
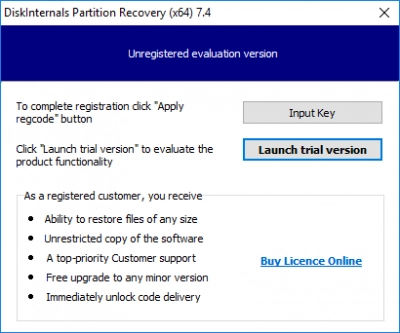
DiskInternals Partition Recovery will return documents, photos, videos, music, and other important files of different types no matter what size they are. The software works with all versions of the Windows operating system.
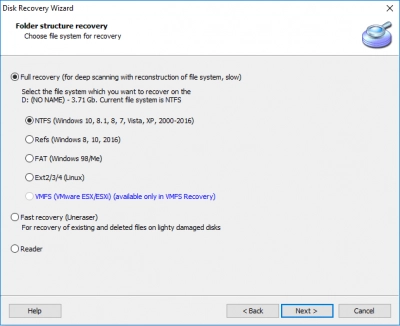
The free trial version of DiskInternals Partition Recovery is available right now. With its help, you can preview the files beforehand. And as soon as you make sure that this software suits you completely, purchase a license and enter the license key.
The built-in wizard will help you even if you are using such an application for the first time. Unlike the previous methods, when you use DiskInternals Partition Recovery, you are insured against failure.
Step 5. Disk Management for creation and formatting
You can use Disk Management to create a new volume (if the disk shows only unallocated space) or to format the hard disk if an external hard drive is not showing up after using all the above methods. Just remember, formatting will delete all data from the disk. In any case, the software can correct this situation.
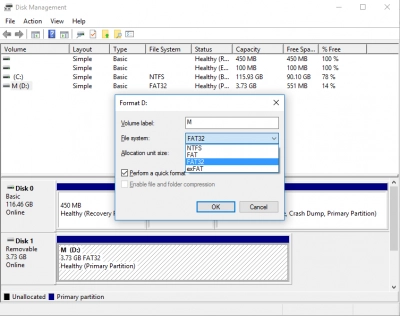
To create a new volume, do the following: right-click on This PC / My Computer. Next, click Manage, then Disk Management. Then find and select the external hard disk and right-click on it, then select “New Simple Volume”. Next, the wizard will help you create a new volume.
To format an external hard disk, do the following: Go to Disk Management, as described above, and select the external hard disk with the right mouse button. Select Format and choose Format Type from the list.
For large external hard drives, it is preferable to format the NTFS file system. Safely disconnect your external hard drive and re-attach it to the computer. It should be detected.

