Disk is Write-Protected? Don't Give Up Yet!
It can happen to any disk from classic HDD to USB drive, on Windows 10 or on the previous versions. But, what does if the disk is write-protected?
Here you will find out:
- why it does happen to your HDD or SSD disk
- how to remove write-protection
- how DiskInternals Partition Recovery can help you
Are you ready? Let's read!
Write-protected Disks: Overview of the Situation
Write protection occurs not only on an SD card but also on any removable disk: an external SSD or hard disk, USB drive, etc. If the disk is write-protected, the user cannot open, add or copy files to or from the disk. In addition, this function will not allow you to perform some actions accidentally: you cannot by chance format a disk or delete data from it, nor can any malicious program (for example, a virus) damage your photos, videos, or other documents.
In other words, if the disk is write-protected, then it is read-only and you will receive a message like this when you try to access it: “The disk is write-protected. Remove the write-protection or use another disk."
Why is the Disk Write-protected?
The disk is write-protected for several reasons:
- Not enough disk space. If your drive is filled with information, this will lead to a write-protection.
- Flash drive switched to read mode. This is done by a special lever on one of its sides. You can also do this by looking at the disk properties and marking the folders and files with the “Read Only” checkbox.
- Security settings do not allow the use of a disk. This can be selected in the default settings.
- Damage by virus or other malware.
- Logical damage to the disk; for example, bad sectors.
- Disk life has expired. As a result, you cannot access it, and instead get a message like: “The disk is write-protected on Windows 10”.
What do you do in such situations? How do you remove write protection? How you remove write protection from an SSD disk in Windows 10?
All this will be discussed further.
0. Check Removable Disk Body
Some disks have a physical switch for write protection. Check if this is true for you and if it is, you are very lucky. Just switch the lever in the opposite direction and reconnect the USB flash drive to the computer. If you can safely use the flash drive — great. If there are no changes and the disk is write-protected, do not worry.
There is a solution, but first things first.
1. The disk is write-protected? Get back your files first!
Why? Because basically, every way to remove write protection from a disk risks the deleting of your data.
Of course, there is just a possibility that this will happen, but are you ready to play roulette with your files?
So, in order to return and save your data you need a good software tool, of all the countless choices on the Internet. But you do not need to search, since the best software is DiskInternals Partition Recovery.
You will ask: why? It's simple.
This application will recover files of all formats no matter the size. Common file systems like UFS, HFS, NTFS, XFS, Ext2 / 3/4, ReiserFS, FAT12, ReFS, and Reiser4 are all supported by DiskInternals Partition Recovery. Using the application, files can be previewed or fully restored; it's your choice. Right now you can try the free, fully functional trial version of DiskInternals Partition Recovery.
You can make sure that this product works even for beginners, but professionals will be happy to work with it.
2. Let’s deal with write-protection!
Here are 4 methods to deal with write-protection.
Method 1. Check the drive for viruses
The disk may be write-protected on Windows 10 due to the presence of viruses on it.
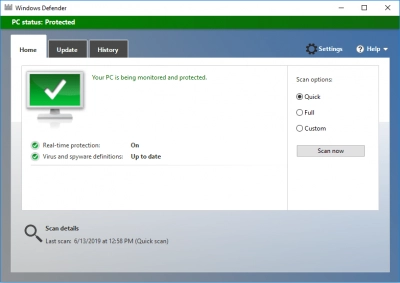
In most cases, the virus check occurs automatically, but if you have a removable disk, then you cannot be sure about the safety of other computers in which your flash drive was connected. Therefore, connect your disk to a computer with a good, updated antivirus program and check the disk for viruses.
Method 2. Check for a full disk
In order to see whether your disk is full, do the following:
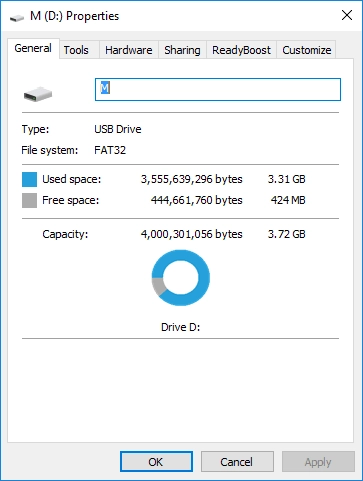
Go to My Computer and right-click your drive. From the list, select Properties. Now your screen will display how much disk space is occupied and free.
Method 3. Check for write-protection on the files
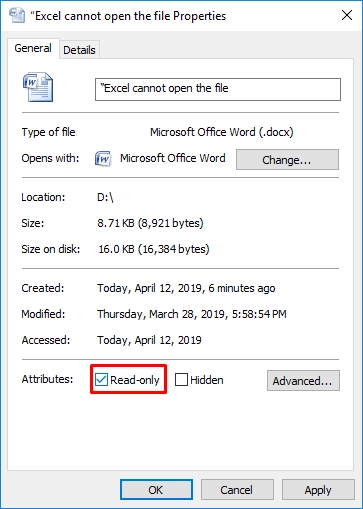
Often there are situations where only one of the files cannot be read. And here is what to do in such a situation: Right-click on a file that cannot be read. Then click Properties. Go to the Attributes section and look at the Read Only tab. If the icon is set this way, remove it. That's all. The file should be editable.
Method 4. Use Diskpart command utility
This method is effective, but most likely all data will be deleted in the process. If you made a copy of the data using DiskInternals Partition Recovery, you have nothing to worry about.
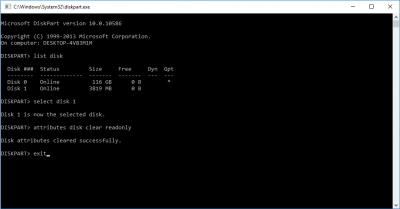
So, open a command prompt in admin mode. Type “diskpart” and press Enter.
Type “list disk” and press Enter.
Then write "select disk X” (X is the number of the disk that cannot be read).
Type “attributes disk clear readonly”. Press Enter.
Type “exit” and press Enter.
Now close the command prompt and check your disk for operability after restarting the computer. If this method did not help, proceed to the following method.
Method 5. Use Regedit command utility
This method is based on editing the registry of the operating system.
Press the key combination Windows + R.
In the blank line, type the following command: “regedit” and press Enter.
Next, go to registry location:
HKEY_LOCAL_MACHINE\SYSTEM\CurrentControlSet\Control\StorageDevicePolicies
Next, you need to find a key named WriteProtect and double-click it. A new DWORD window will open, where you will need to select a value of 0 or 1.
0- removes disk write protection.
1- sets write protection on disk.
Accordingly, enter 0 and press OK.
Restart the computer and reconnect the drive. Now the disk should be available for editing, saving, copying data, etc.
As you can see, if you do everything in a timely manner and in order, any complex problem can be solved.


