
Deal with the logilda.dll Error in Windows 10 Now!
In this article you will find out:
- how to deal with this issue
- how to protect your data
Are you ready? Let's read!
About This Issue
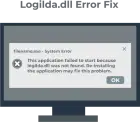
The logilda.dll error occurs on computers with Logitech mice. Usually it appears when Windows starts and looks like this: “Problem with starting C: Windows System32 LogiLDA.dll, the specified module could not be found.” Sometimes this issue appears due to a recent update to Windows. There are a number of ways to remedy this situation.
Use Task Manager
Try disabling LogiLDA (Logitech Download Assistant) on Windows startup:
Press Windows + R andenter taskmgr in the Run text box. Open the Task Manager and click the Start tab, then select LogiLDA in the list of startup items and disable it. If you see other Logitech startup components, turn them off as well. If the problem with “logilda.dll Windows 7” is not resolved, continue to another solution.
Edit Registry
You can try removing the Logitech Download Assistant key from the registry if you are confident in your skills. Be careful when modifying the registry, or back up the registry ahead of time.
So, open Run (Windows Key + R), type regedit into the Run text box and press Enter.
In the text box, type the path of the Registry Editor:
KompyuterHKEY_LOCAL_MACHINESOFTWAREMicrosoftWindowsCurrentVersionRun
Then Click the right-mouse button on Logitech Download Assistant, and then select Delete. Next, delete the Logitech registry key using a batch file and exit the registry to make sure the Logitech Boot Assistant is completely removed from Windows Startup. Restart your computer and see if the “logilda.dll not found” error persists.
\Delete Third-Party Software
Usually, uninstalling the Logitech SetPoint software helps if there was a problem starting C//windows/system32/logilda.dll.
It can be removed like any other software:
Open the Run window (Windows Key + R) andenter appwiz.cpl, click OK.
In the search box, type Logitech SetPoint and select SetPoint software, click the Uninstall button. Confirm your actions and at the end reboot Windows.
If uninstalling the program does not give the desired results, you can reinstall this application.
You should now download and install the latest version of SetPoint software.
Work with Device Driver
Try reinstalling the Logitech driver, it will also ensure you have the latest updated driver. So, enter devmgmt.msc in the Run field and select the result, Mice and Other Pointing Devices. Expand the list of devices, right-click the Logitech HID and select Uninstall Device.
Restart your computer and Windows will reinstall the default mouse driver.
If the system does not find new drivers, start updating the drivers automatically using a third-party driver installer. Such applications will automatically and regularly check the status of the drivers and the system and update the system components as necessary.
Make Sure Your Data is Safe!
Having trouble accessing your device, or has important data been corrupted? Fix it with DiskInternals Partition Recovery.
This program will help you find peace of mind without worrying about irreversible data loss. The scan results are confirmed by 15 years of successful data recovery and positive feedback from the company's customers. Even if you formatted the disk or it was damaged or encrypted by virus attacks, you can get back inaccessible files of any type and size thanks to DiskInternals Partition Recovery.
This program is so easy to use that anyone can work with it. You just need to press a few buttons, select the options suggested by the Recovery Wizard, and be patient to achieve unparalleled results. You may be surprised, but before restoring, you can preview each found file marked with a red cross for free.
Don't worry, you won't be forced to pay; the license is required only at the last optional step - to export the viewed files. As a bonus, you get remote technical support from the best specialists in the company for a year after purchasing a license.

Instructions for using DiskInternals Partition Recovery:
1. Download and install DiskInternals Partition Recovery.
2. The Recovery Wizard will start automatically and will guide you through all the steps to help you recover files from your device. You will be prompted to select the basic options for extracting data: the file system (it will be detected automatically; you just need to make sure you choose the correct one) and the way to open the device (quick scan, full scan, or read mode).
3. The next step is the scanning process.


4. Preview and restore files from the device.
View all files or some of the found files by right-clicking one of them. Select Preview in New Window.
5. Save your data. To save the recovered files from the device, you just need to buy a license and enter the license key. It is better to save the files to another storage device (USB stick, external hard drive, etc.).


Be sure to use this app when needed and you will have peace of mind with your data!