How to Recover Data from a damaged RAID Drive Array

RAID arrays represent a transformative approach to data storage, widely embraced by system administrators and IT experts. These configurations deliver distinct advantages like parity, fault tolerance, redundancy, and enhanced speed. Yet, despite their superiority over conventional single-drive systems, dealing with a failed RAID can be overwhelming for many users.
Contrary to the common apprehension among system administrators, encountering a compromised RAID array doesn't spell the end for your data. Equipped with appropriate tools, you can rectify the array issues. Moreover, a variety of RAID recovery software exists to effectively salvage data from your RAID array drives. This article will delineate the process for retrieving your data from compromised RAID setups.
Steps to Recover Data from a Damaged RAID Array

When you discover a failed drive in your RAID array or a non-functional controller, follow the precautions below to prevent total data loss in the RAID array.
It's crucial to remember that, although some RAID types offer redundancy and fault tolerance, these features are not replacements for actual data backups. Always maintain backups (incremental or differential) to keep your important files safe and accessible, even in the worst scenarios of data loss.
Now, let’s discuss how to safeguard your data when your RAID array is compromised for any reason.
Step 1: Stop Using the RAID Array
The initial step is to cease all operations on the RAID array — avoid copying new files to the RAID or executing any advanced actions. This precaution helps prevent the overwriting of data you wish to retrieve. Continuing to use a damaged RAID reduces the chances of a successful recovery.
Instead, store new data on an alternative single-drive storage medium (perhaps an external storage device) and transfer the new data back to the RAID once you've rebuilt the array. This strategy increases the likelihood of retaining your data, especially after successfully recovering data from the damaged RAID drives.
Step 2: Disconnect Hard Drives from the RAID Rack
Once you've ceased using the damaged RAID, the next step is to remove the drives from the array. Regardless of the array's size, whether it contains just two disks or as many as five, disconnect all of them. Ensure the system is completely powered down before physically detaching the drives.
Note: It's advisable to label the disks in their original configuration (parity disk, data disk, etc.) during removal. This labeling aids in reassembling the array accurately. Avoid using sharp objects for marking, as physical damage to a hard drive can be detrimental. Instead, opt for a marker or pen.
Step 3: Use SATA/IDE Connectors to Connect Drives
With the disks removed, you'll need to connect them to a computer to access them individually. Use a SATA or IDE connector, depending on the disk type, to read the drive on a computer.
Connecting the drives individually allows for diagnostic tests to determine the extent of damage. Data recovery from a failed drive (within the array) is only possible when it's individually connected to a computer with a RAID recovery solution installed.
Note: Exercise caution when connecting the drives to avoid damaging the interfaces, which could further hinder data recovery efforts. Inspect the drives, connection cables, and the hardware RAID controller for physical damage.
Step 4: Check Disk SMART Status & Clone Failing Drive
Before employing RAID recovery software to retrieve data from your RAID drives, perform a “SMART” scan on all the drives. This scan evaluates the health of the hard drives and the feasibility of data recovery.
Here’s how to conduct a SMART scan:
- Launch Windows Terminal, Command Prompt (Admin), or PowerShell (Admin).
- Run the command:
wmic diskdrive get status. This command returns “Ok” or “Pred Fail,” indicating the drive's condition. - For more detailed information on your drives, use:
wmic diskdrive get model,serialNumber,size,mediaType.
Note: S.M.A.R.T. stands for Self-Monitoring, Analysis, and Report Technology. It is a basic utility and not as advanced as Check Disk (CHKDSK). Avoid running CHKDSK on a drive from which you intend to recover files, as it may reduce the chances of a successful recovery.
After assessing each drive's status within your RAID array, clone the drives identified as “faulty” to prevent data loss. Cloning involves creating a “Disk Image” file for the drive(s), achievable using DiskInternals RAID Recovery or another preferred disk cloning software.
How to Clone a Hard Drive

Numerous disk cloning software options are available. However, DiskInternals RAID Recovery is highly recommended for its disk cloning feature and comprehensive RAID recovery tools. It is compatible with all Windows versions, including Windows Server editions and Vista.
Thanks to DiskInternals' user-friendly interface, navigating the app and accessing disk management and recovery features is straightforward. Shortcut keys, such as CTRL + C, allow for easy hard drive cloning after selecting the drive.
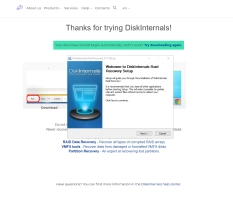
- Download and install DiskInternals RAID Recovery, then launch it.
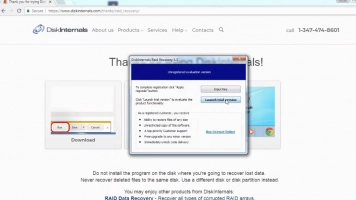
- Close the automatically opened “Recovery Wizard.”
- Connect the hard drive to be cloned to the computer where the software is installed.
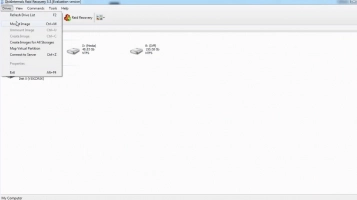
- From the DiskInternals RAID Recovery home screen, right-click on the drive and select “Create Image.”
- Choose the “Entire Disk Content” option.
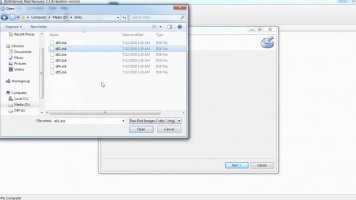
- Select a location to save the image file.
DiskInternals RAID Recovery will clone your hard drive and save it as a disk image file for free. This tool allows for the cloning of multiple hard drives at no cost. Interestingly, DiskInternals recovery solutions also support data recovery from image files.
Upon completing the cloning process, you can proceed with attempting data recovery. This cloning serves as a failsafe, providing a backup in case the recovery process inadvertently damages your RAID drive(s) further.
Steps to Recover Data from a Damaged RAID Array
Recovering data is a straightforward process, but it requires careful attention to detail. If you follow all the mentioned precautions, you're well-positioned to undertake this recovery. RAID recovery is performed disk by disk, meaning recovery from each disk occurs individually.
The recommended RAID recovery tool is DiskInternals RAID Recovery, which supports a wide array of features and can recover formatted RAID logical volumes. It supports all known RAID arrays, including RAID 0, 1, 10, JBOD, and many others. Here’s a brief overview of the software’s features:
- Supports Hardware, Hybrid, and Software RAIDs.
- Compatible with RAID 0, RAID 1, RAID 0+1, RAID 1E, RAID 5EE, RAID 60, and others.
- Supports LVM Thin Provision, ZFS with RAIDZ & RAIDZ2, NTFS, and ReFS (with Deduplication).
- Runs on all versions and editions of the Windows OS.
- Offers manual and automatic recovery modes.
Damaged RAID Array Recovery Guide

- Download and install DiskInternals RAID Recovery on your PC running Windows 7-11 or Windows Server 2003-2019.
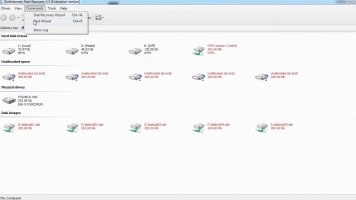
- Launch the program, ensuring your RAID drives are properly connected and accessible on the PC.
- If opting for manual recovery, close the “Wizard”; otherwise, follow the Wizard’s automatic recovery prompts.
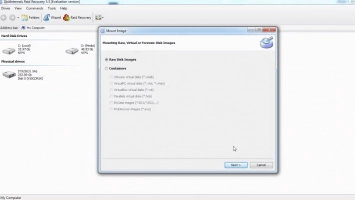
- Select the drive to recover from, identify the RAID array type, and choose a Recovery Mode. Full Recovery mode is recommended for complete and effective results.
- DiskInternals RAID Recovery will automatically assess the RAID array, file system, controller, and disks before attempting data recovery.
- Once the scan is complete (duration may vary based on total data size on the hard drive), all recovered files, along with existing files, will be displayed. Recovered files are marked with a red asterisk for easy identification.
- The recovered files will be available as “Read Only,” allowing you to preview most of them. Confirm these are the files you wish to recover. To save the files, upgrading to the paid version of DiskInternals RAID Recovery is necessary.
What More?
Recovering files from damaged RAID arrays is feasible with a professional RAID recovery solution. However, it's imperative to avoid overwriting lost data by continuing to save new data to the drives after identifying a failing array.
With DiskInternals RAID Recovery, even novices can navigate the data recovery process, thanks to the software's simplicity and intuitive recovery wizard. If you're unable to recover your RAID data using DiskInternals RAID Recovery or find the process too technical, consider consulting a professional data recovery expert for assistance.
Conclusion
In conclusion, recovering data from a damaged RAID array, while daunting, is entirely feasible with the right approach and tools. The key steps involve ceasing use of the RAID array to prevent further data loss, carefully disconnecting and diagnosing the drives, and utilizing specialized RAID recovery software like DiskInternals RAID Recovery to clone and retrieve lost data. It's crucial to follow these steps meticulously to maximize the chances of a successful recovery. Furthermore, this process underscores the importance of regular backups as a fundamental practice in data management, ensuring that even in the face of RAID array failures, data integrity and accessibility are maintained. Whether you're an IT professional or a novice, the tools and guidelines provided make RAID data recovery a manageable task. However, in situations where the recovery process proves too complex or technical, seeking assistance from a professional data recovery expert is a wise decision. Ultimately, with the right preparation and response, recovering from a damaged RAID array can be a straightforward process, safeguarding your valuable data against potential loss.
